1 Overview
Modular Character Customization is a plugin that provides the ability to customize character with different modular parts. Each part will be saved as an independent asset and you can mount different part easily.
2 Introduction
Modular Character Customization plugin provides the modular part editor to modify parameters (e.g. material, transform, lighting) of each part. Each part will be saved as an independent asset and can be easily mounted by one function call. Click here to see the definition of moular character.
-
Support to edit and save modular part information.
-
Support to preivew the part with independent viewport.
-
Support to add modular part with skeletal mesh.
-
Support to add attached part of static mesh or skeletal mesh.
-
Support to mount different parts from blueprint synchronously or asynchronously.
-
Support to unmount different parts.
-
Support to set visibility by slot name or socket name.
3 Quick Start
Following blew steps, you will use this tool quickly. In the example project, we use the Stylized Character Kit: Casual 01 mesh pack in the Unreal Engine Marketplace Created by: RocketArts.
3.1 Add Modular Part
Create different moludar part assets as follow.
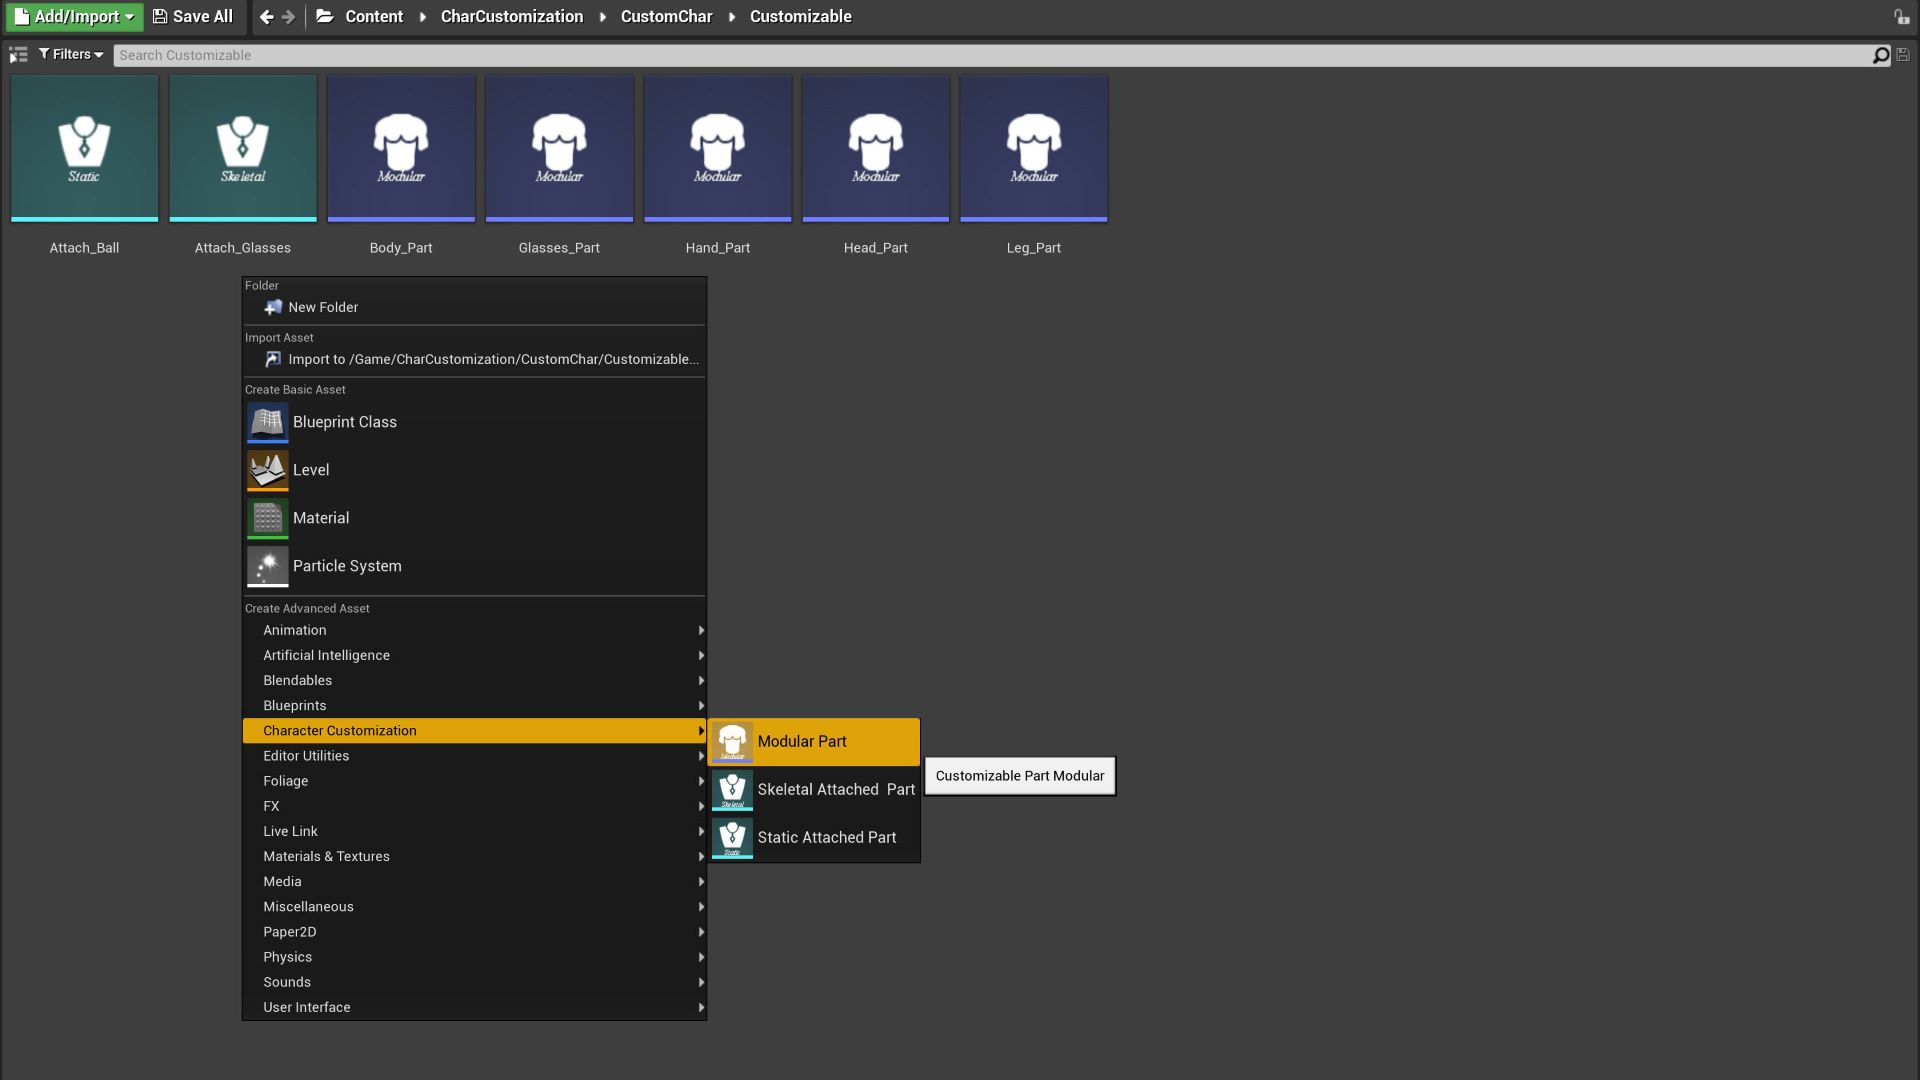
Open the asset and edit it.
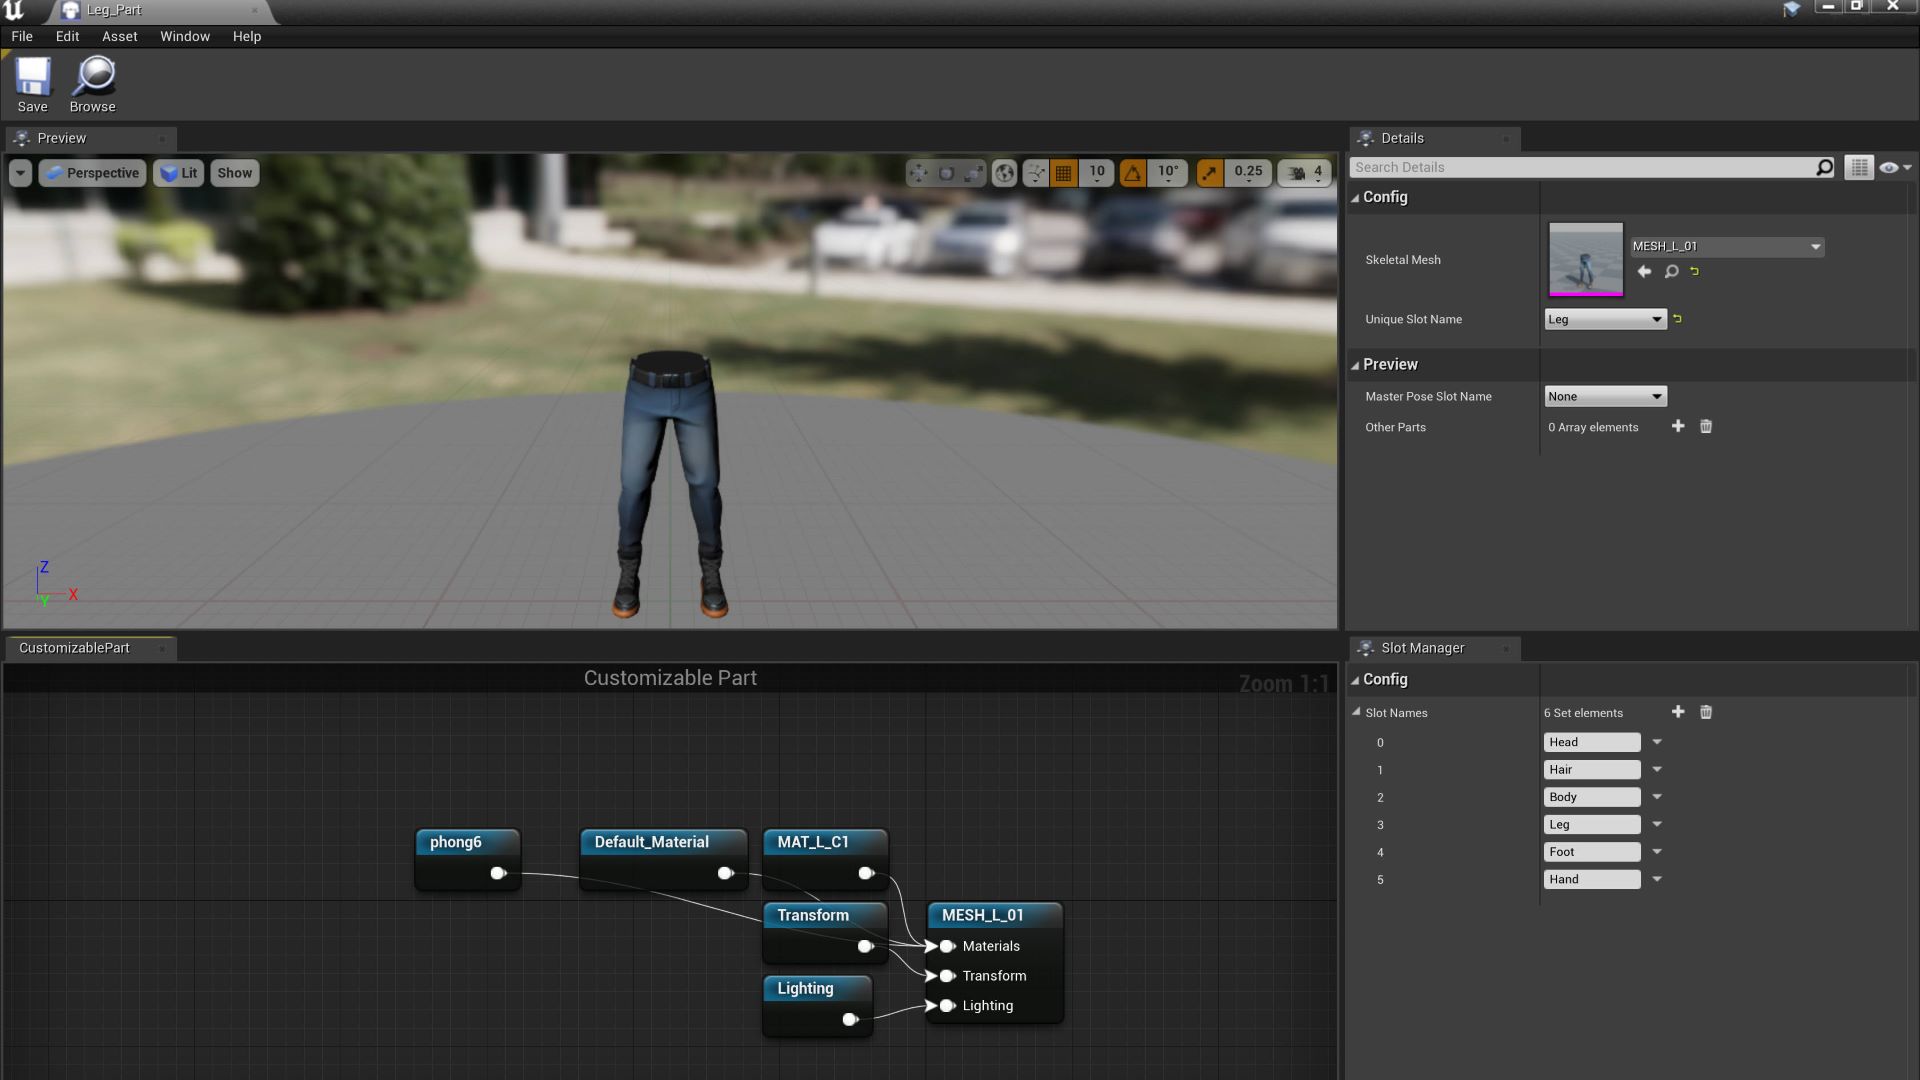
Slot Name
The slot name is used to identify each part of character. You can add slot name from the slot manager tab and set the slot name for current edited part.
Attached Part
Beside the modular part, you can add the attached parts of static mesh or skeletal and these parts will be attached to character by socket name. Notice that you must have the modular part to construct the character before mounting attached parts.
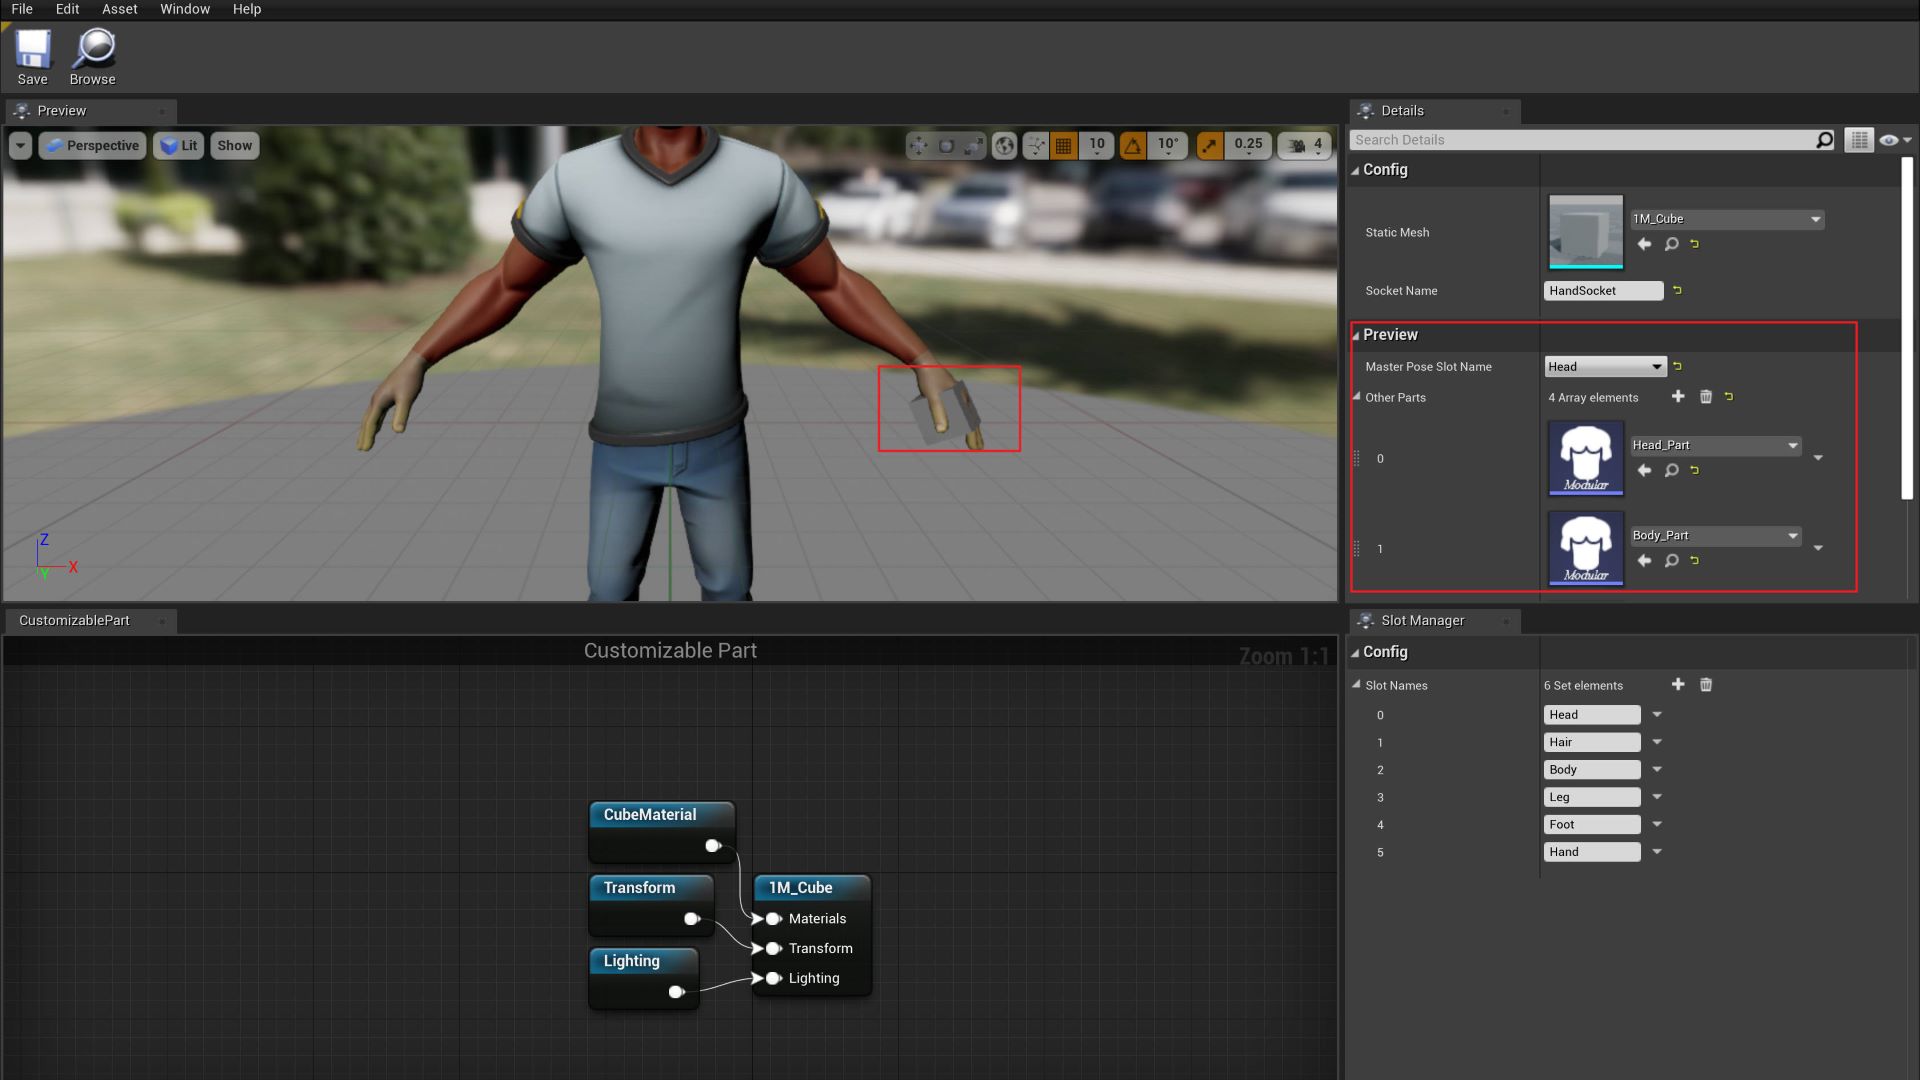
Preview
As the above image, you can add preview config to see the effect without playing.
3.2 Add Customizable Mesh Component
Add a CustomizableMeshComponent to your character blueprint as follow.
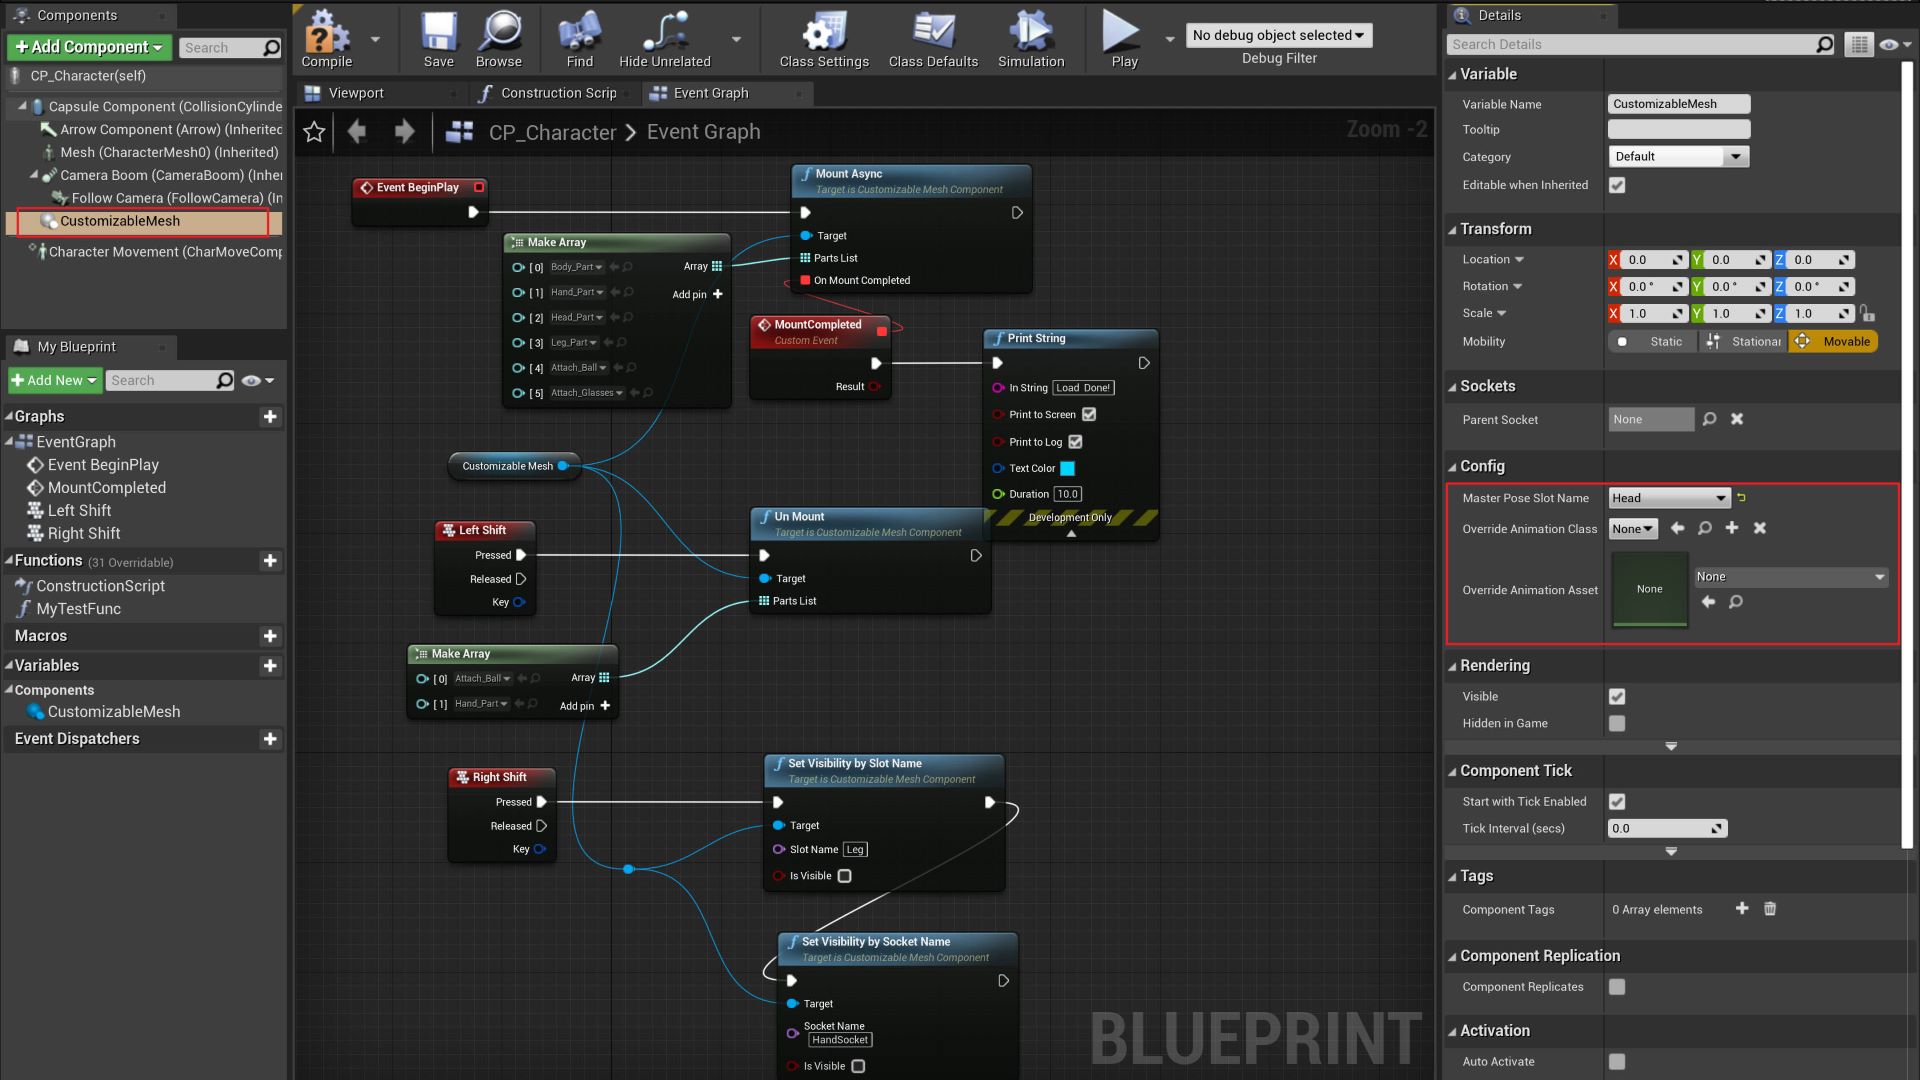
Parameters:
-
MasterPoseSlotName: The part with this slot will be used as the master pose, which means the character animation will be drived by this master pose part (click here to see MasterPoseComponent).
-
OverrideAnimationClass: If this parameter is valid, it will replace the default character animation class (Anination Mode will be changed to Use Blueprint Animation).
-
OverrideAnimationAsset: If this parameter is valid, it will replace the default character animation asset (Anination Mode will be changed to Use Animation Asset).
Fucntions:
-
MountAsync: Mount part asynchronously which will not block the game thread.
-
MountSync: Mount part synchronously.
-
UnMount: Detach and destroy the parts.
-
SetVisibilityBySlotName: Change visibility for the part with target slot name.
-
SetVisibilityBySocketName: Change visibility for the part with target soket name.
4 Compile plugin for your C++ project
if you want to add the plugin to your own project, just following the steps given below.
-
Put plugin to folder “Plugins” in your project.
-
Right click your project file(.uprojcet) and select “Generate Visual Studio project files”
-
Open Visual Studio project and complile.
5 Support
In the event you are unable to find the information you seek, feel free to contact easycomplex.tech@gmail.com.