1 Overview
Compact MiniMap is a plugin that provides the ability to indicate any actor in the level from a 2D viewport.
- Quick Preview: Compact MiniMap Preview
2 Introduction
Compact MiniMap is a plugin that provides the ability to indicate any actor in the level from a 2D viewport. You can indicate any actor in the world from the minimap. You can design your own widget item and add it to the minimap. Besides the actor location and rotation in the world, you can pass any extra parameter to your item if you need.
3 Quick Start
Following blew steps, you will use this tool quickly.
3.1 Prepare blueprint asset
Several assets should be prepared before using this pack. Notice that users can get those assets from the example project. Users can use these assets directly or just modify them if needed.
3.1.1 Create minimap controller blueprint
Create a bluepint and set its parent class as “Mini Map Controller”. Users can directly use the BP_MiniMapController in the example project.
3.1.2 Create minimap widget
Create a widget blueprint and set its parent class as “Mini Map Widget”. Implement following functions.
-
OnInit(): Initialize the settings of minimap widget
-
OnMiniMapResized(FVector2D AdjustSize): Update the minimap widget while the map size changed.
-
OnAddItem(UMiniMapItemWidget* ItemWidget): Add widget item to target canvas panel and update settings, while item has been created.
-
OnAdjustMiniMapAlignment(FVector2D AlignValue): Adjust the minimap alignment while the minimap has been moved.
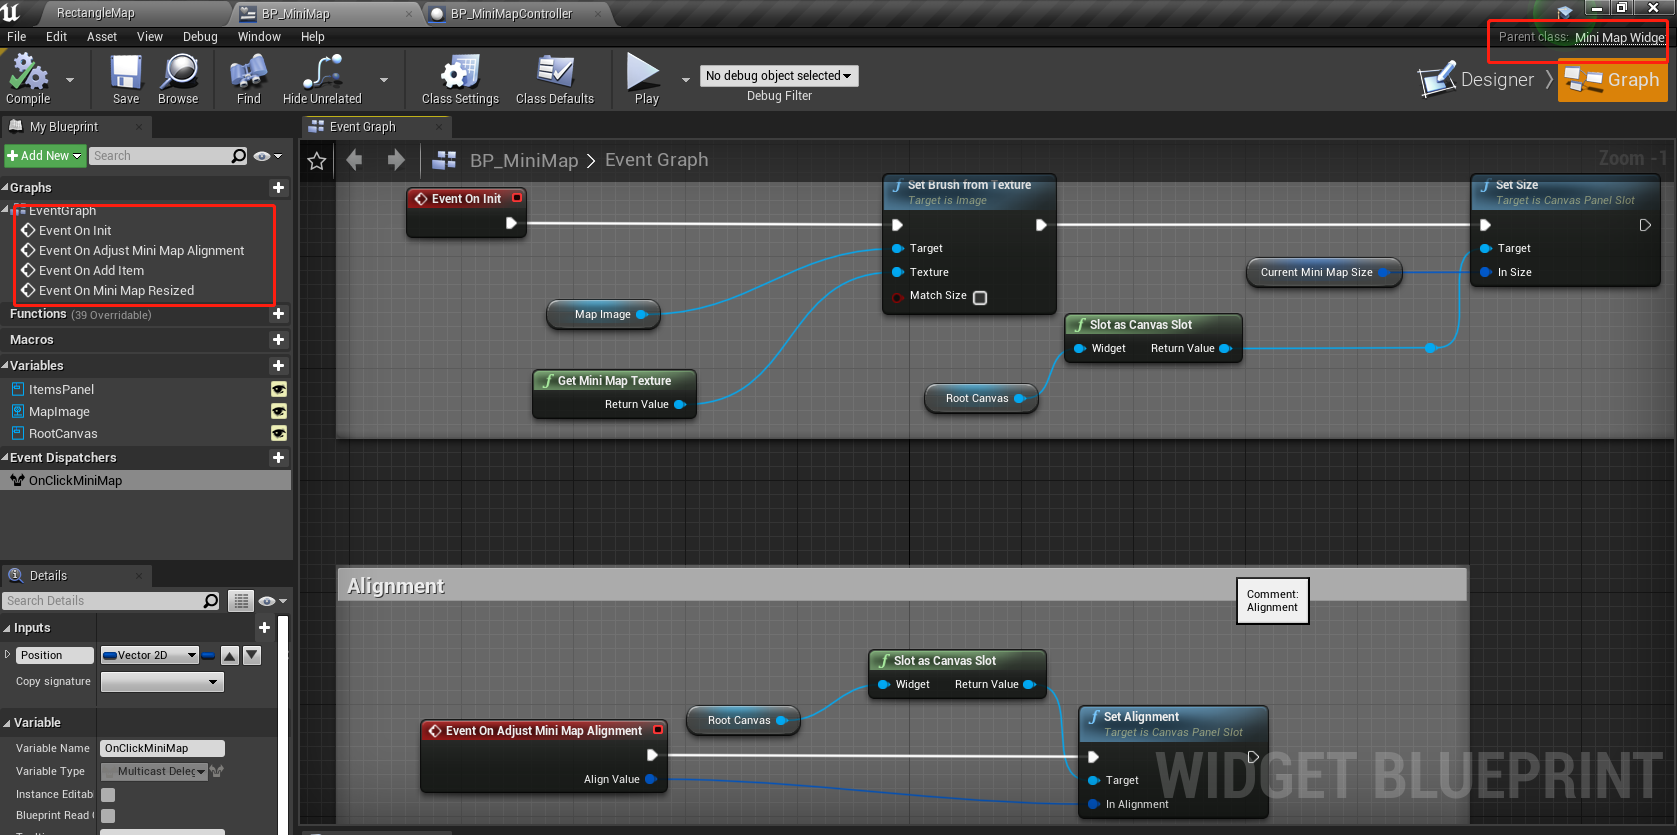
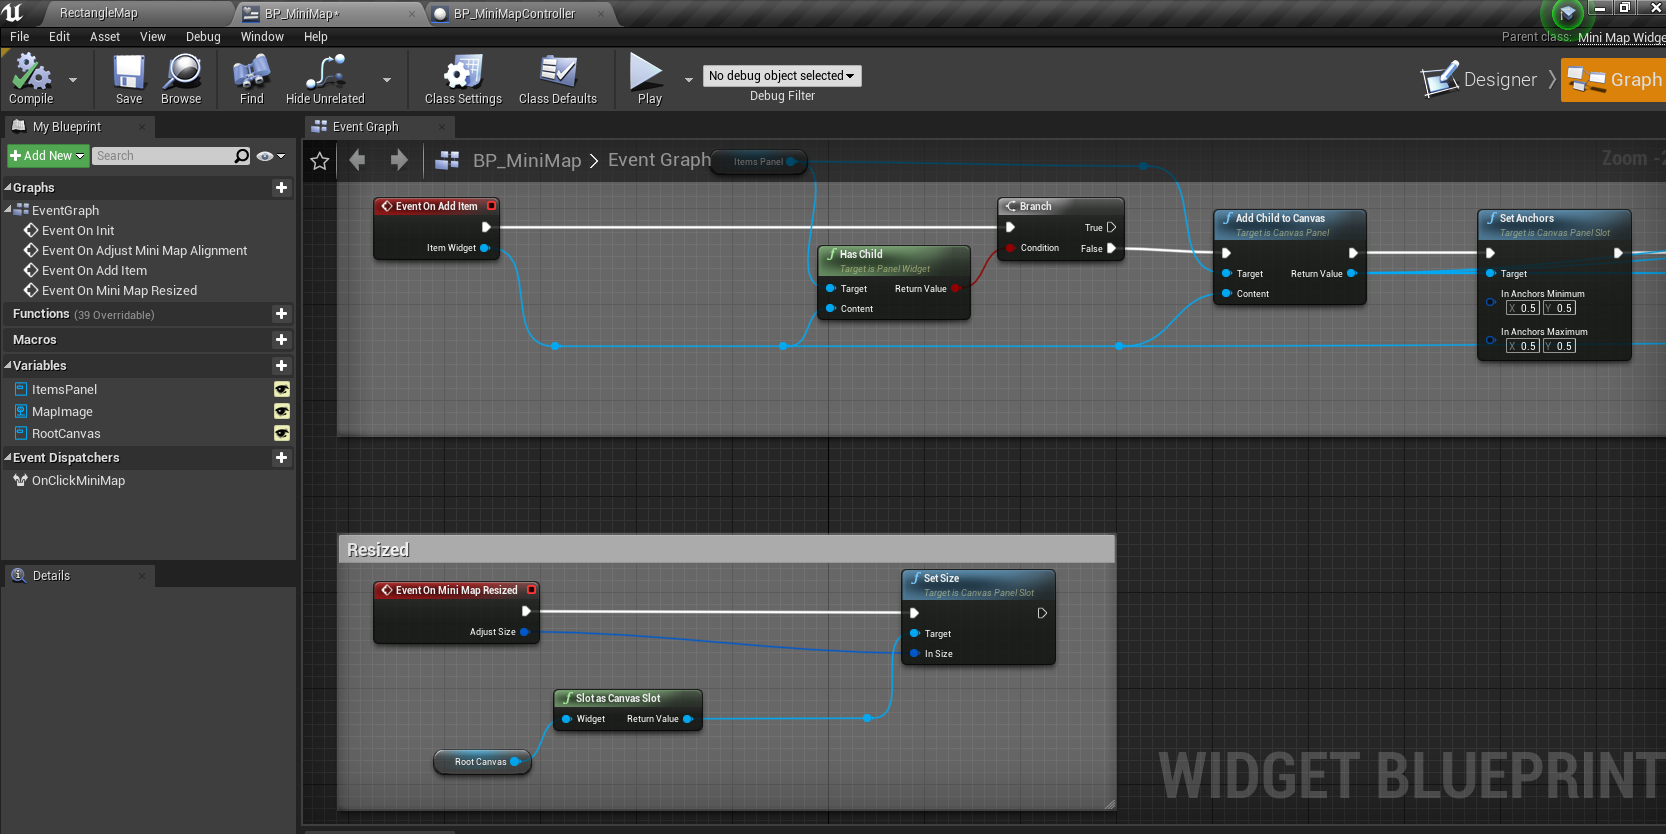
Notice that user can directly use the BP_MiniMap in the example project.
3.1.3 Create minimap texture
Create a level texture from top view. Users can quickly get a level texture by UE build-in high resolution screenshot from top view.

3.2 Add BP_MiniMapController to level
Drap the “BP_MiniMapController” to your level and config the parameters.
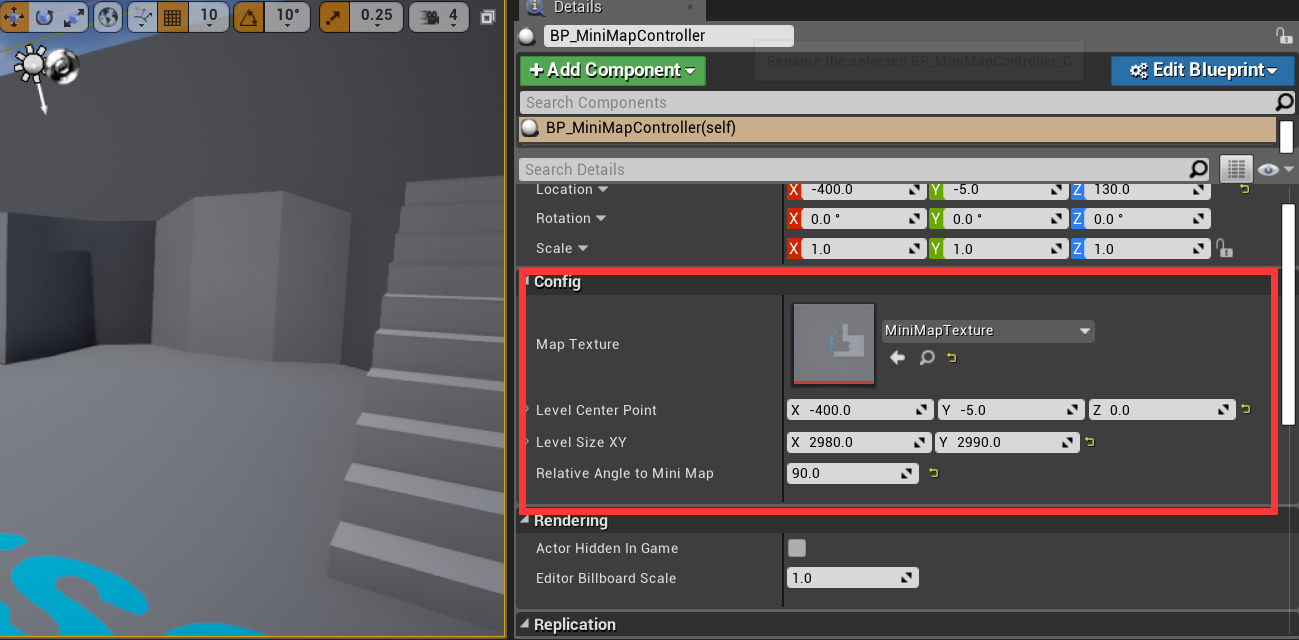
The following properties must be configured:
- Map Texture: Level texture from top view.
- Level Center Point: World location of level center point.
- Level Size XY: Level size from top view (cm).
- Relative Angle to MiniMap: Relative angle between level and level texture.
3.3 Add BP_MiniMap to parent widget
Place “BP_MiniMap” in your own widget, as follow.
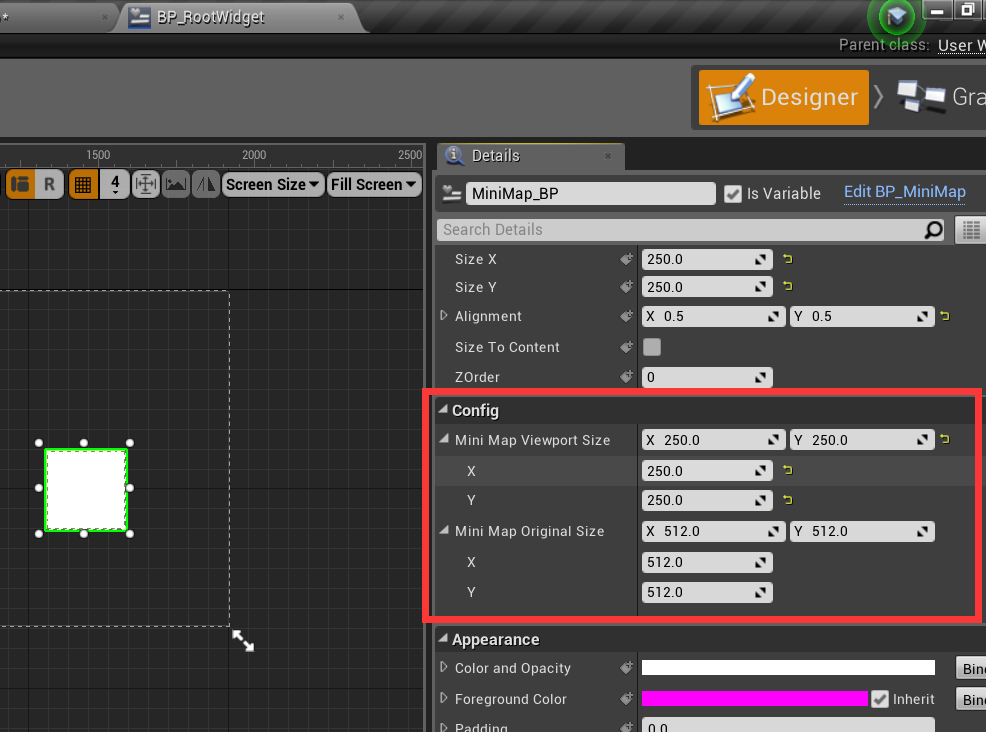
The following properties must be configured:
- MiniMap Viewport Size: Viewport size to show minimap.
- MiniMap Original Size: The entire minimap size (unfolded).
An example is given in Content\MiniMap\UMG\BP_RootWidget.
3.4 Add MiniMap Instance
After the minimap is created, it needs to be added to controller, as follow.

The “AddMiniMapWigetInstance” function will return the instance id of current widget. Notice that you should keep this instance id if there are multiple minimaps, so you can controll your minimap by instance id.
3.5 Create widget item
Create “UserWidget” and set its parent class as “MiniMapItemWidget”, as follow.
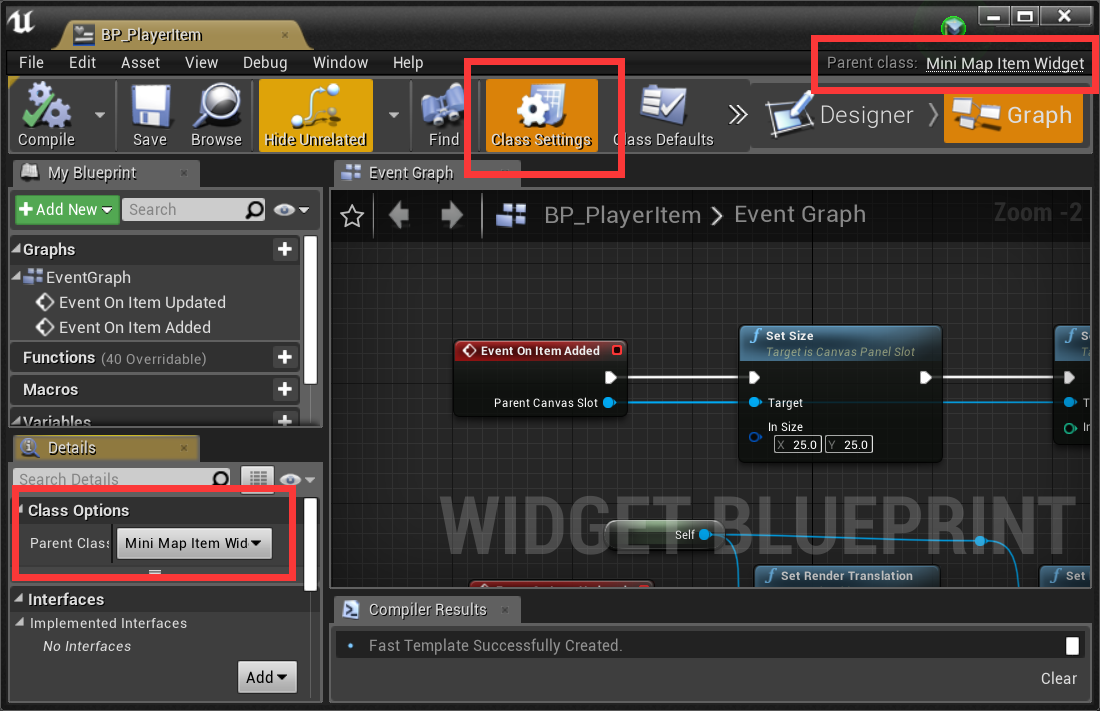
Implement two functions as follow.
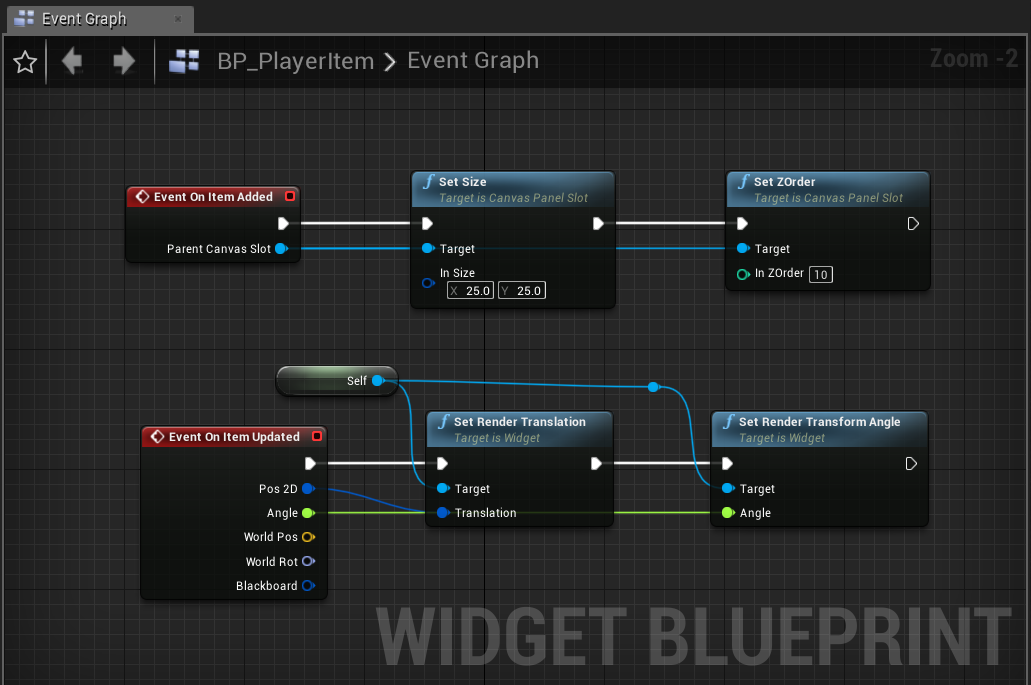
An example is given in Content\MiniMap\UMG\BP_PlayerItem or BP_DynamicItem.
3.6 Add and Update widget item at runtime
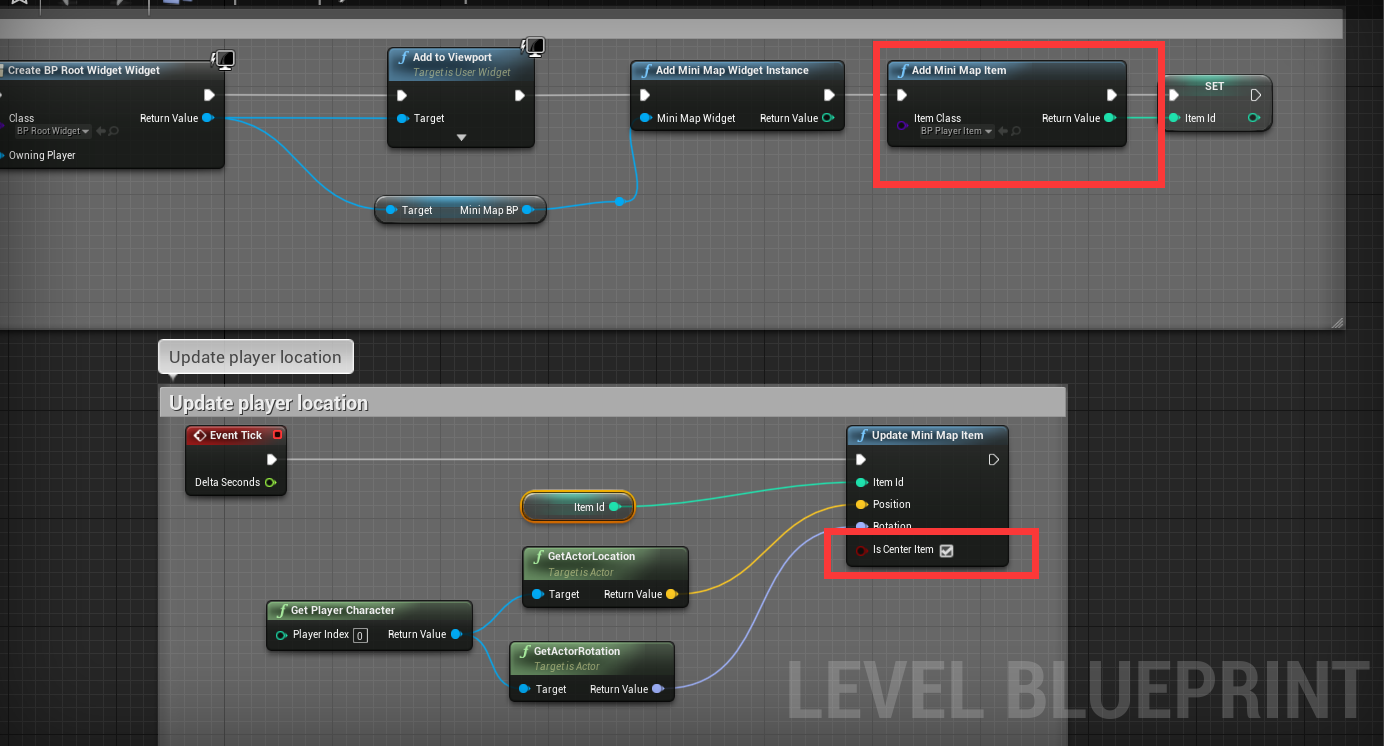
Call “AddMiniMapItem” functin to add a new widget item into minimap and keep the return id to update the item whenever you want.
Call “UpdateMiniMapItem” function to update the item when the actor location changed. IsCenterItem indicates if the actor is always in the center of minimap. Generally, only the player will be this center item.
Notice that there is only one center item in a minimap.
3.7 Pass any parameter to widget item
You can pass any parameter before you call “UpdateMiniMapItem”.
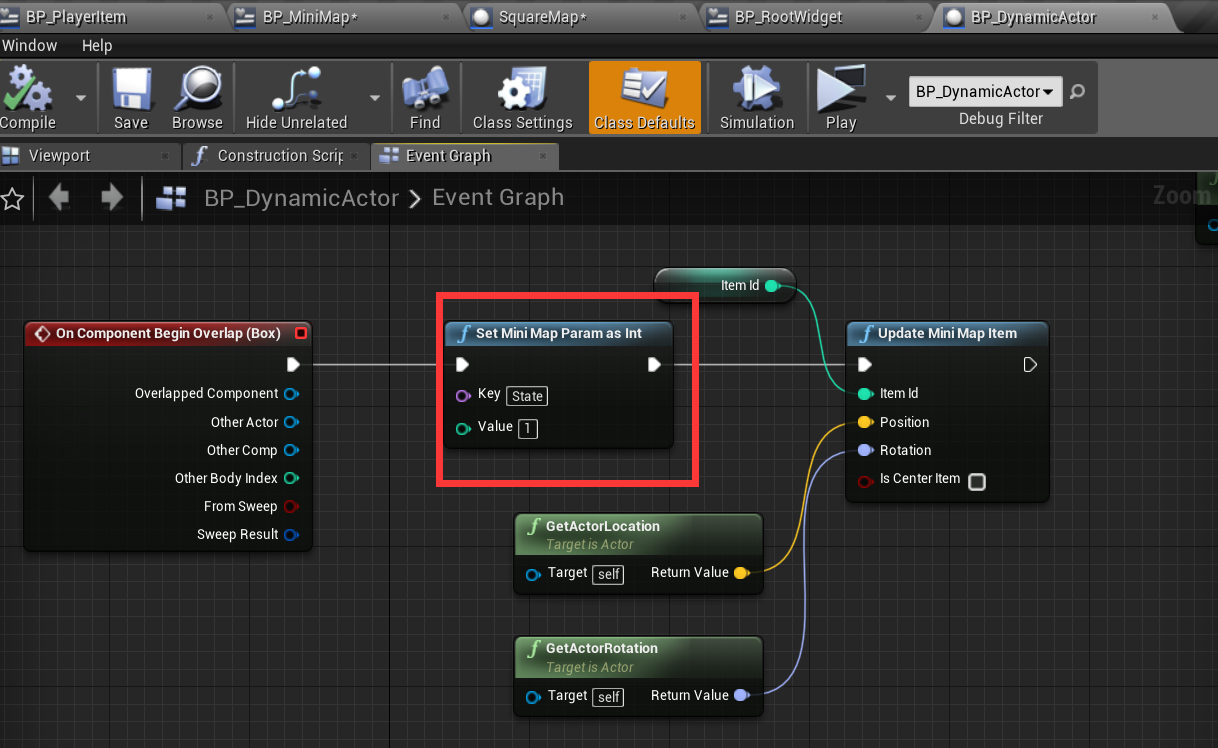
And get it from your widget item.
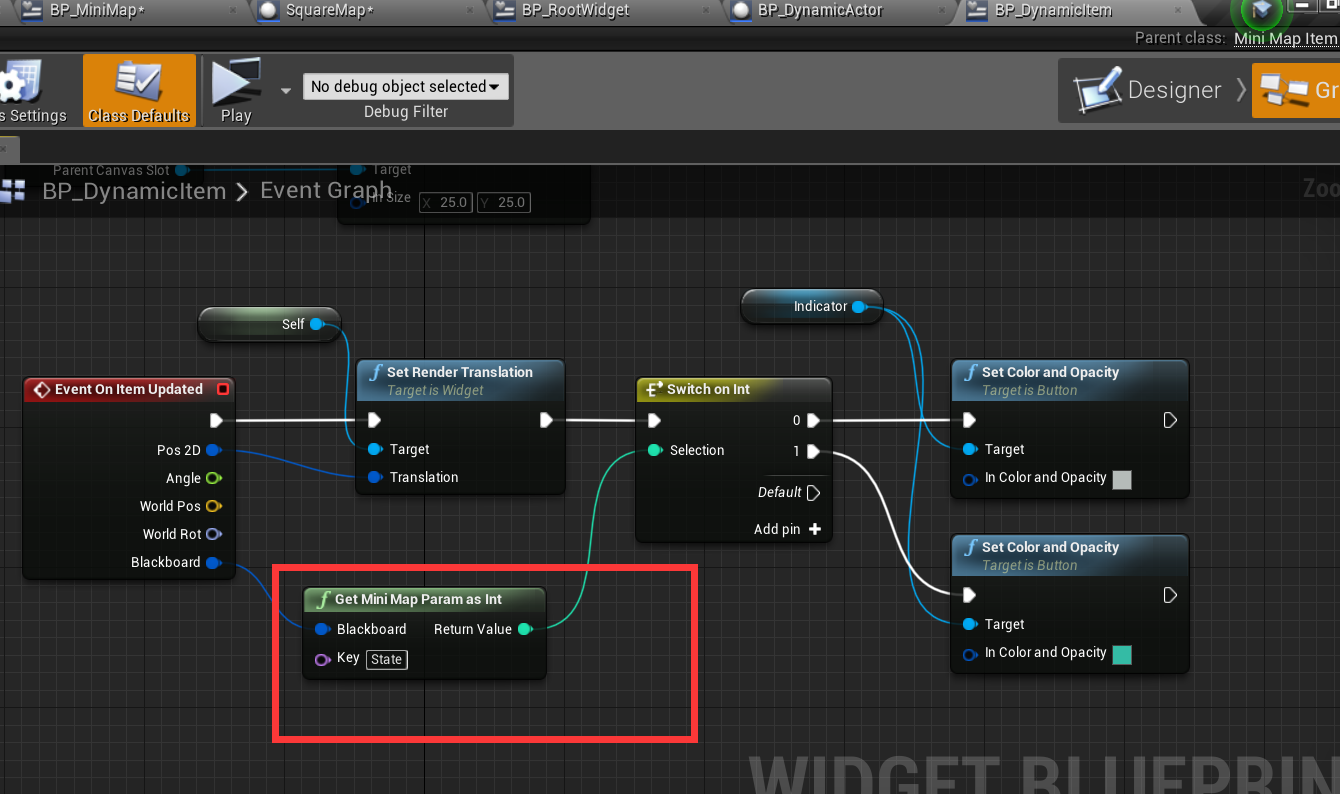
You can use these parameters to control your widget item.
You can check BP_DynamicItem and BP_DynamicActor to see how to use this feature.
4 Compile plugin for your C++ project
if you want to add the plugin to your own project, just following the steps given below.
-
Put UMG_NavigationSystem to folder “Plugins” in your project.
-
Right click your project file(.uprojcet) and select “Generate Visual Studio project files”
-
Open Visual Studio project and complile.
5 Support
In the event you are unable to find the information you seek, feel free to contact easycomplex.tech@gmail.com.
References
[2] UE Marketplace