1 Overview
This article was designed to provide users with a basic overview of the features and functionality of Customizable Flow System.
- Quick Preview: Customizable Flow System Preview
2 Introduction
Customizable Flow System is a plugin, that provides a basic framework to run a customized flow and an editor to edit the flow. The user can design different flows for different purposes, such as plot flow, task flow and so on. The plugin provides the ability to edit the flow graph and serialize the flow data. The user can define different flow node with operations and different output pins. Also, each flow can add a parameter table and each flow node can read and write these parameters, similar to the built-in Blackboard within BehaviorTree The flow is highly customizable.
3 Quick Start
Following blew steps, you will use this tool quickly.
(1) Create your own flow asset
In Content Browser of Editor, click right mouse button and select “Flow” ,and then rename your own flow asset as follow.
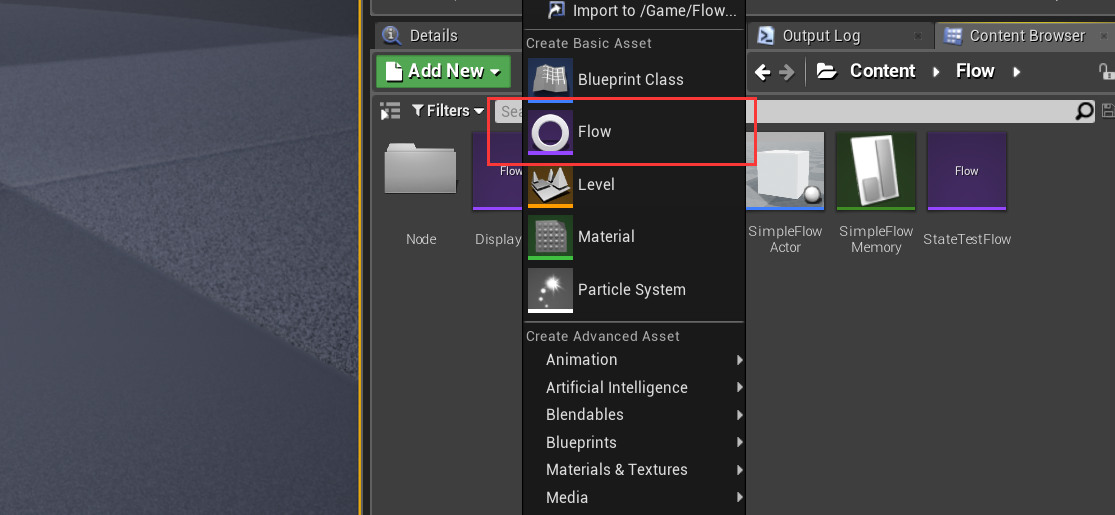
An example is given in “MovingFlow”, located in Content/Flow.
(2) Create your own flow node
Double click the file created in Step (1), and click “New” in toolbar as below.
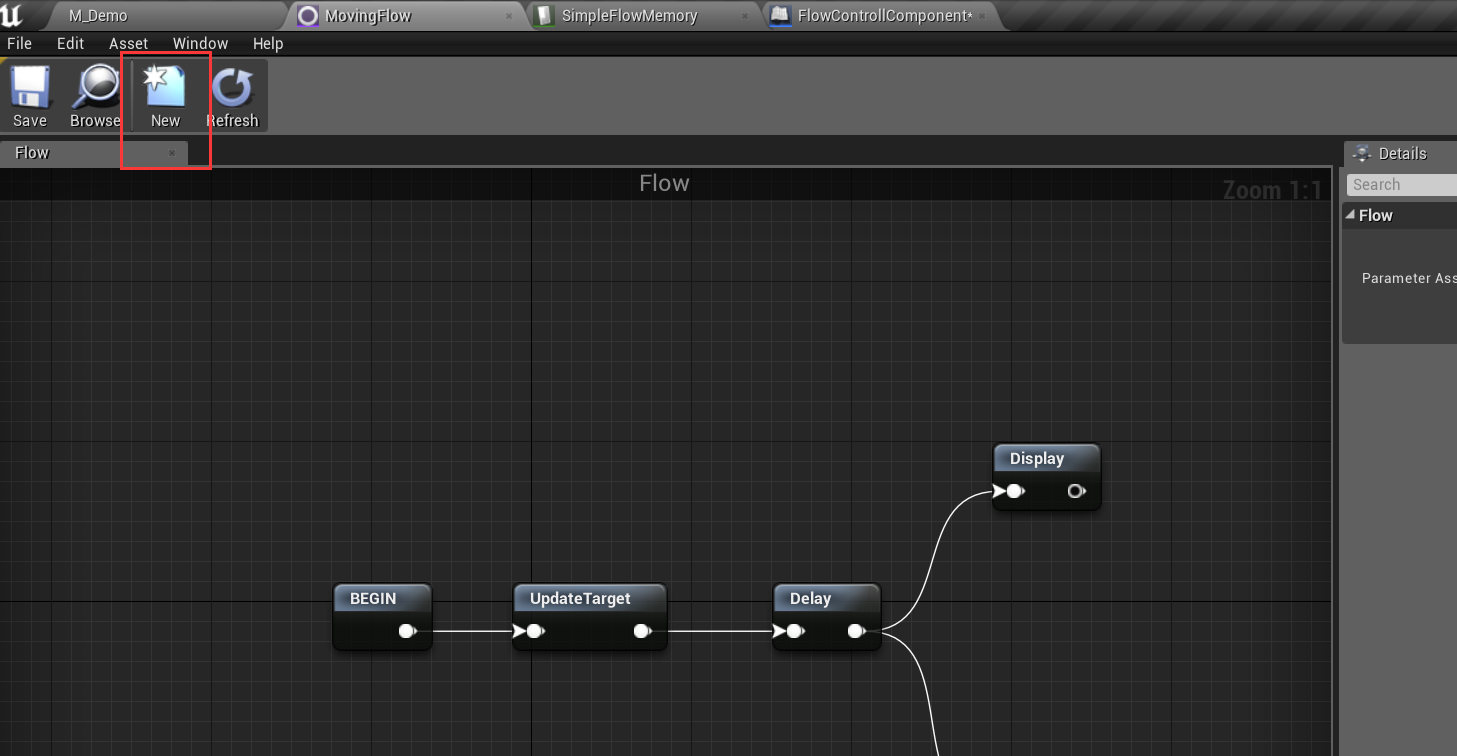
You can also create the flow node by creating a “Bluepint Class” and select its parent class as “UFlowNode_BlueprintBase”.
The example is given in floder Content/Flow/Node.
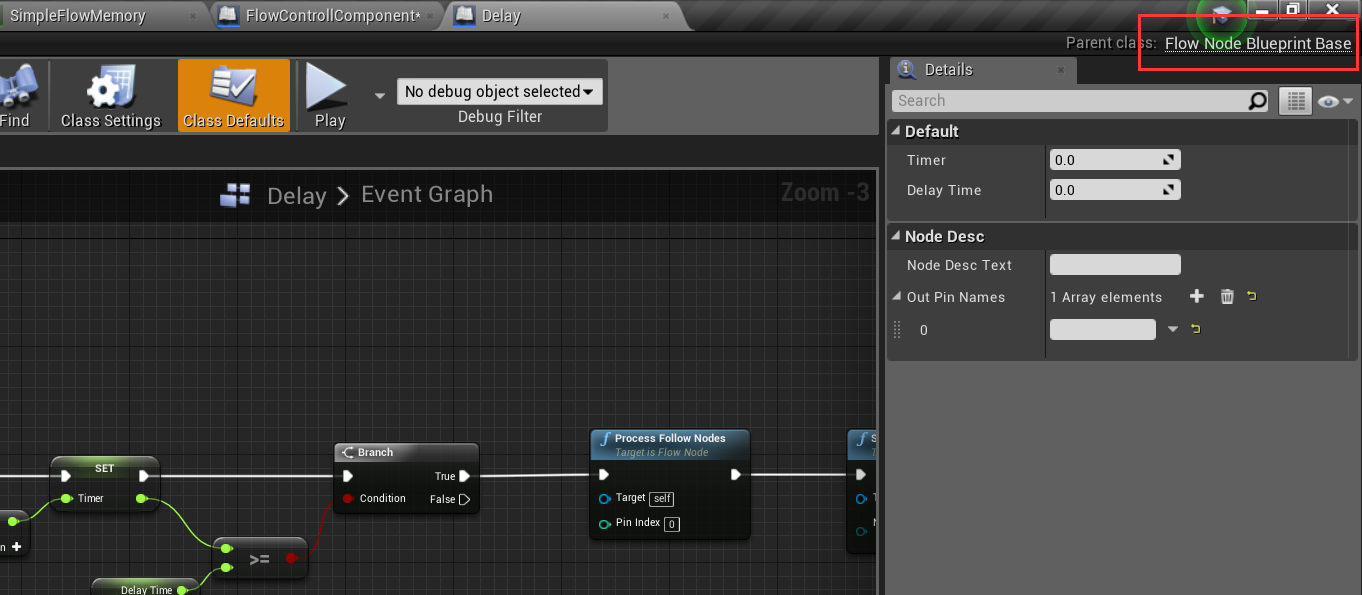
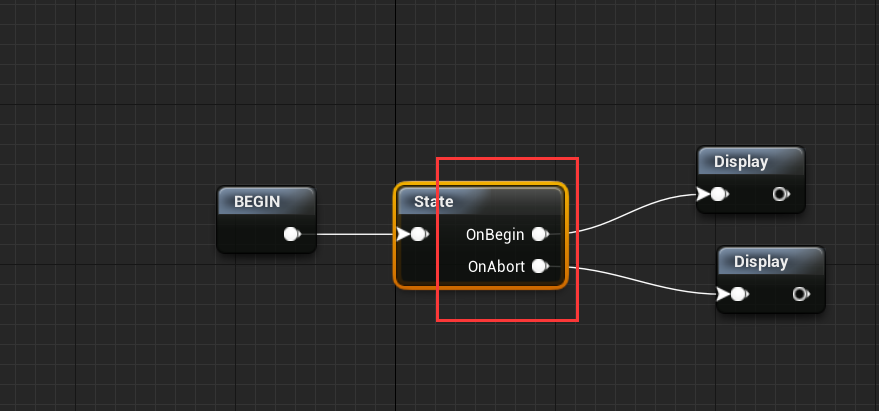
(4) Define your own node output pin number and node description
Open the node asset and click the “Class Defaults” in toolbar. Below the Category “Node Desc”, you can add node description and add any number of output pins as you like.
In the flow graph, you can see the corresponding number of output pins and its description.
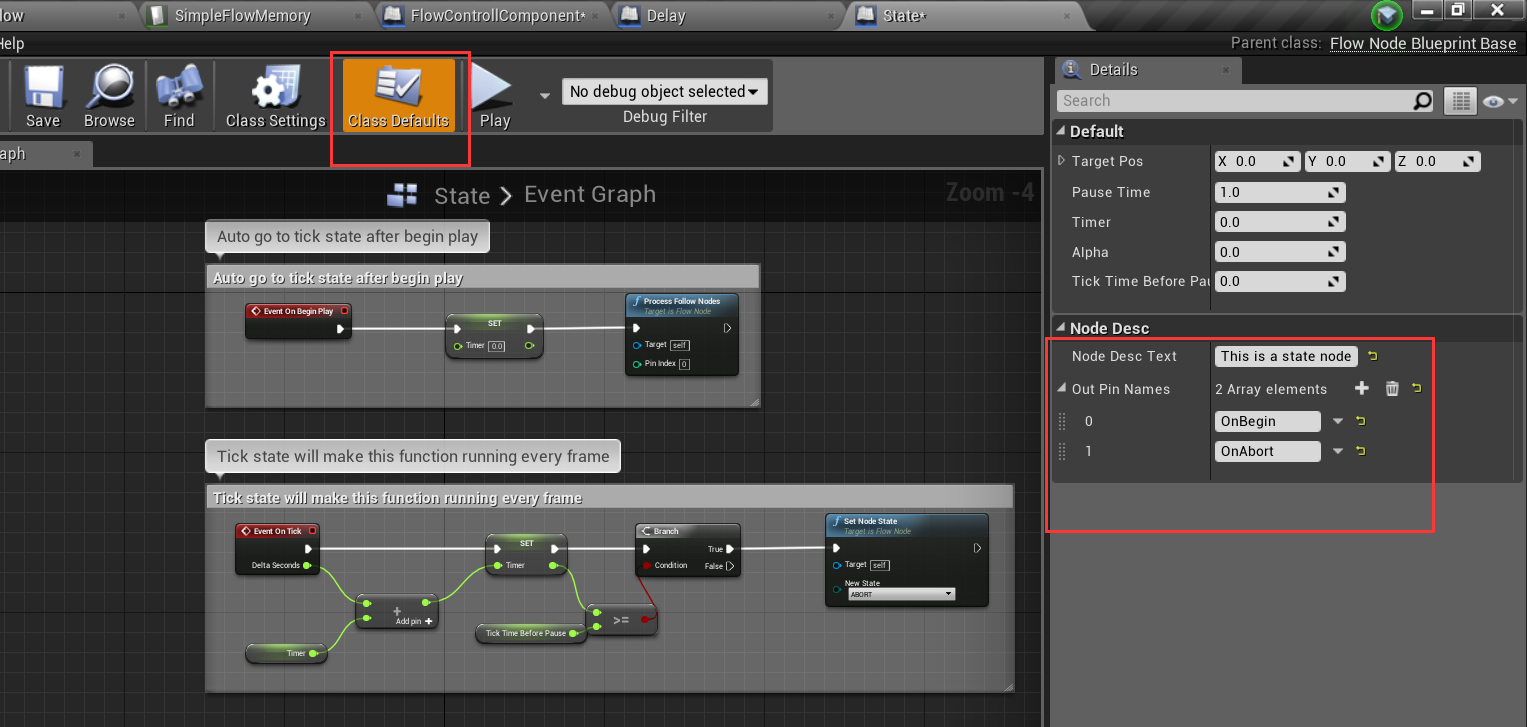
(5) Define your own node logic
Open the node asset and you can use four event functions as follow.
- OnBeginPlay
- OnTick
- OnAbort
- OnEndPlay
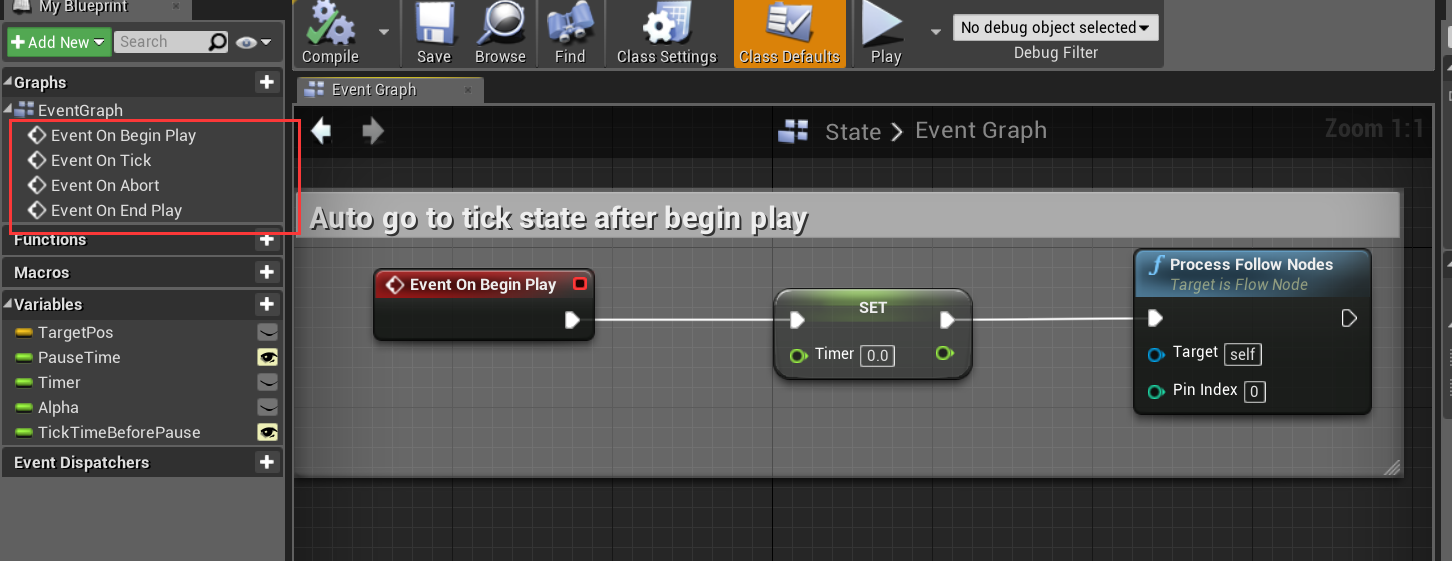
You can switch node state by function SetNodeState.
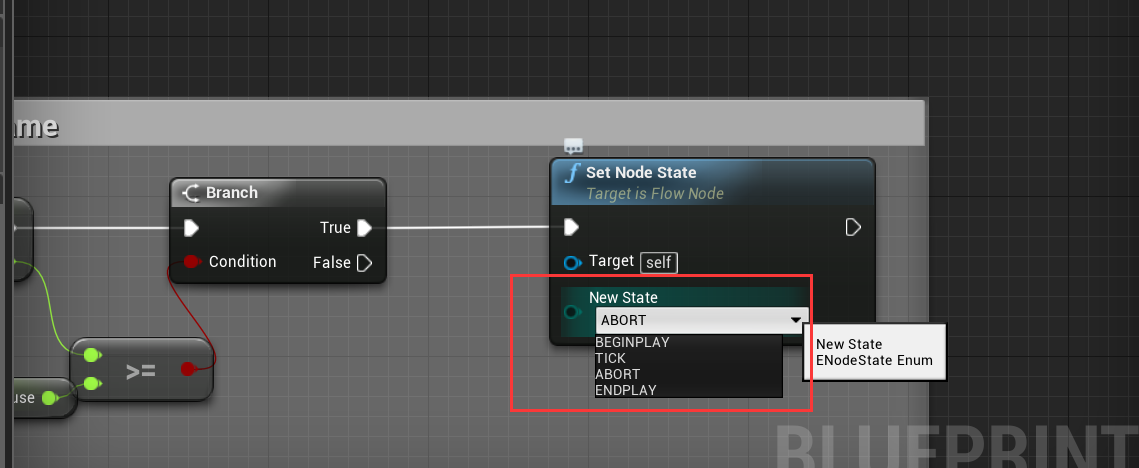
When you set the node state to ENDPLAY or ABORT,the node will stop running. Before stopping the node, you can process the following nodes by calling ProcessFollowNodes.
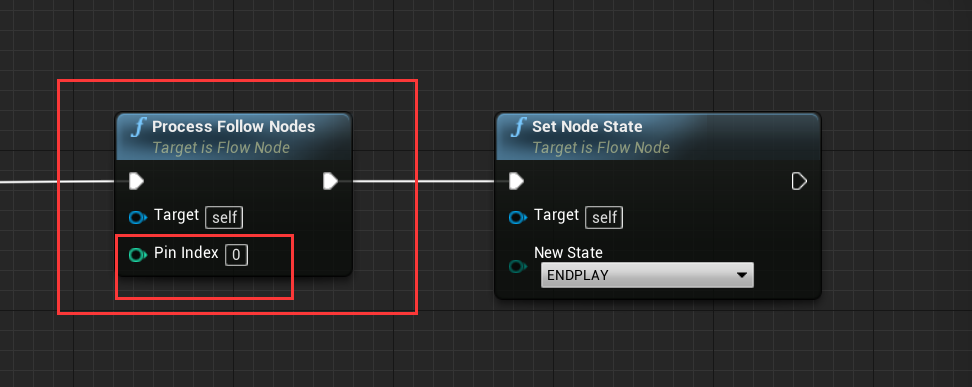
The input parameter Pin Index of function ProcessFollowNodes is corresponding to the pins defined in Step (4). The function will put the following nodes of target output pin into running state. The OnBeginPlay and OnTick of the following nodes will be called in turn.
Other functions:
- GetOwner: Get owner parent flow.
- GetOuterActor: Get actor who controls this flow.
- GetOuterComponent: Get component who controls this flow.
Important tip: Function SetNodeState and ProcessFollowNodes promise the flow running as your own design
(6) Define your own flow parameter table
The usage of parameter table is similar to the Blackboard in BehaviorTree.
In Content Browser of UE Editor, click right mouse button:
Miscellaneous -> DataTable -> Pick Structure Flow Parameter
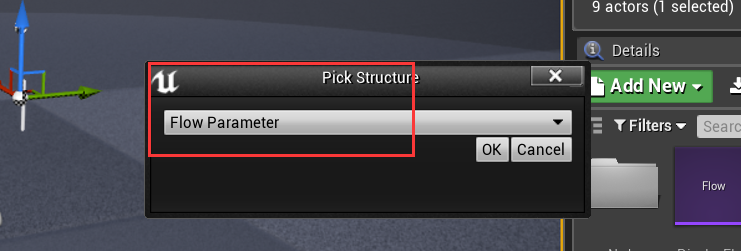
Add the parameters according to your requirement.

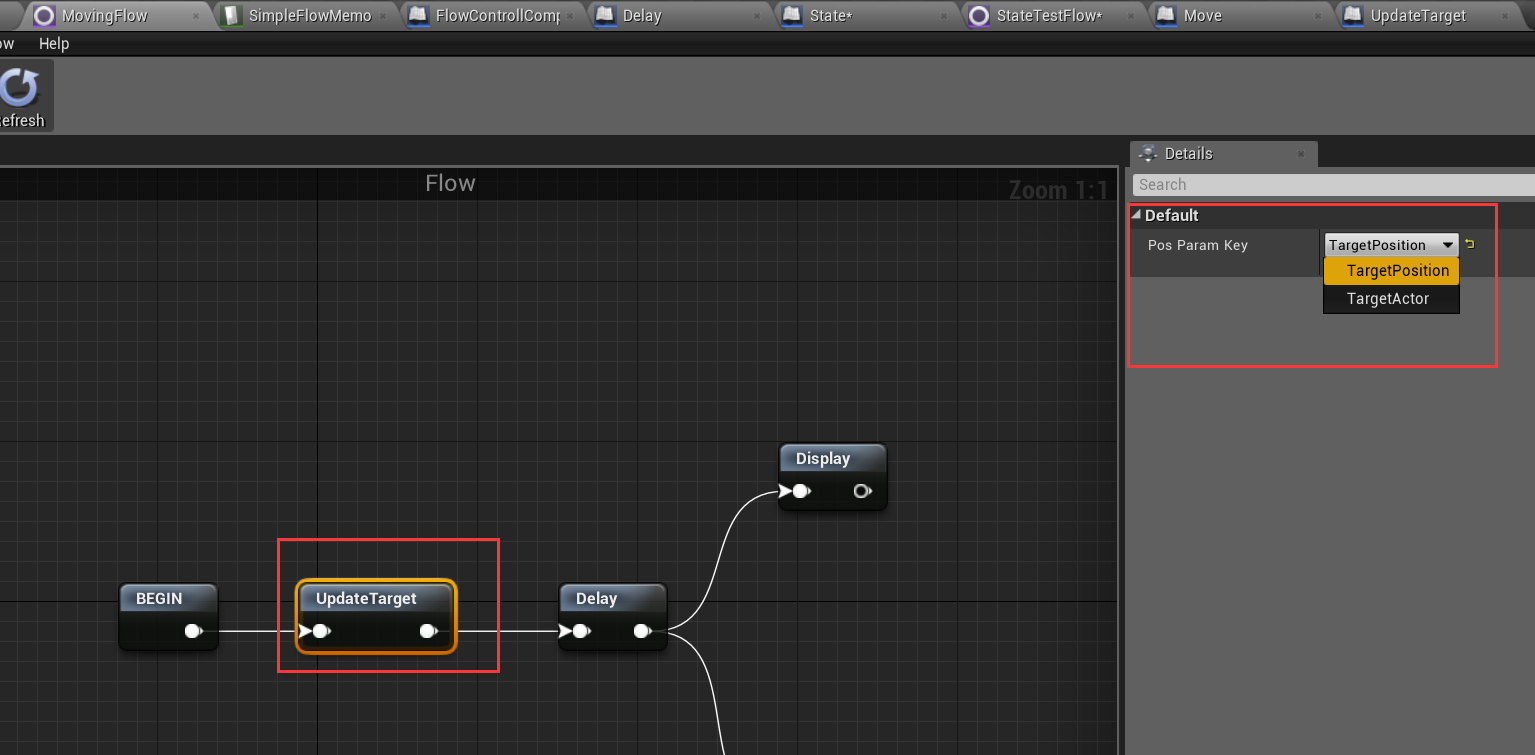
Open the flow asset and select the target parameter table for it, as follow.

You can get or set parameter table variables inside flow node class, as follow.
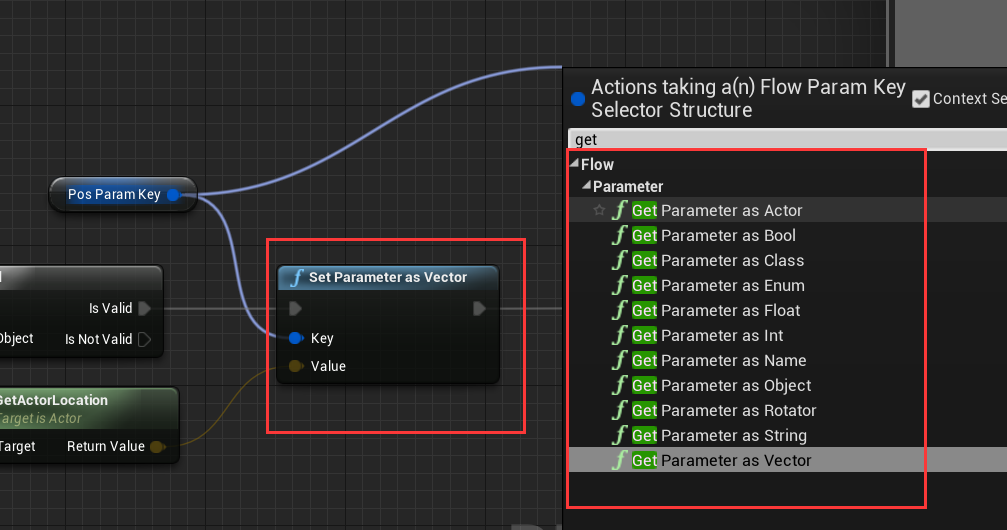
You can define the Key variable using type FlowParamKeySelector, and you can select the target parameter in the detail panel.
The example is given in folder Content/Flow.
(7) Define your own flow controller
The Last thing you need to do is to customize your own flow controller to manipulate your flow. The following functions of flow must be called to promise flow working properly.
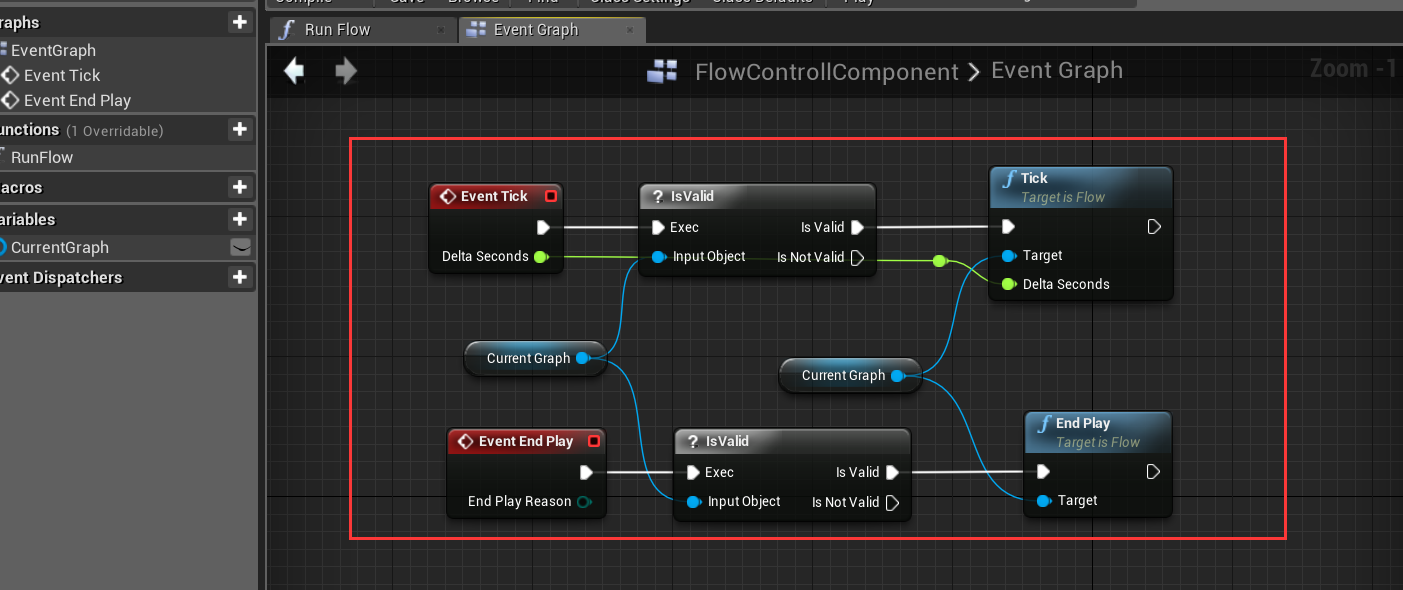
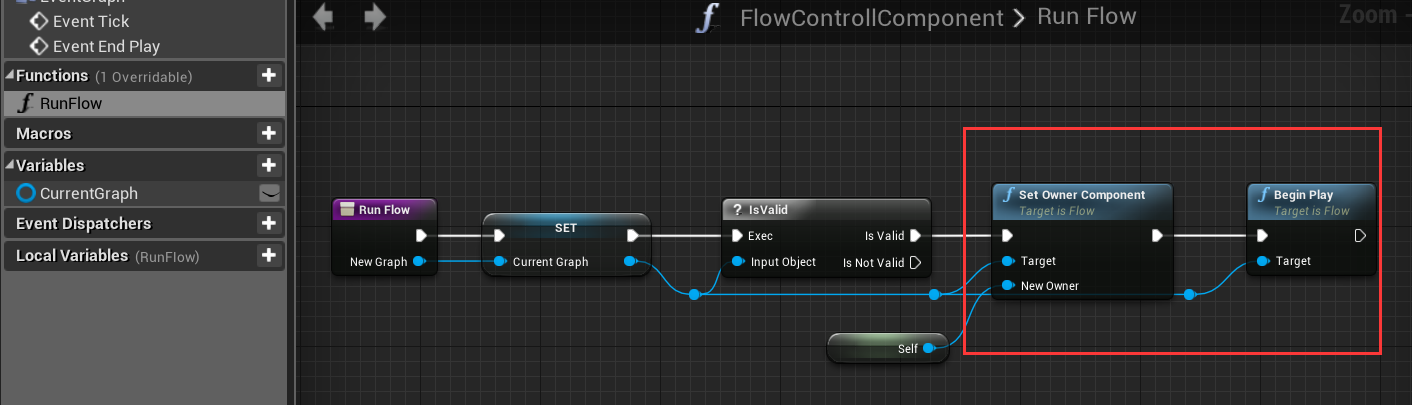
You must to call SetOwnerComponent or SetOwnerActor, so as to the flow node can access outer actor or component.
An example is given in “FlowControllComponent”, located in Content/Flow.
4 Compile plugin for your C++ project
if you want to add the plugin to your own project, just following the steps given below.
-
Put CustomizableFlow to folder “Plugins” in your project.
-
Right click your project file(.uprojcet) and select “Generate Visual Studio project files”
-
Open Visual Studio project and complile.
5 Support
In the event you are unable to find the information you seek, feel free to contact easycomplex.tech@gmail.com.
References
[4] My Assets