1 Overview
Testing Recorder is used to manage all your editor testing records. It is useful for UE or UE5 project teamwork and testing.
2 Introduction
Testing Recorder is used to manage all your editor testing records. One testing record will save your testing config and logic inside a blueprint. You can easily recover your previous testing process. Notice that you can share your testing record to others, it is very useful for teamwork.
Features:
-
Support to config basic editor play properties, such as testing map, number of plays, net mode.
-
Support to config commands running before and after PIE playing.
-
Support to catch log with key words inside testing record blueprint window.
-
Support to override world settings, including default game mode, mouse cursor visibility and lightmass settings.
-
Support to program blueprint testing logic.
-
Support to config testing description.
-
Support to manage all testing record blueprints with a tree view.
-
Support to search testing record inside a window.
3 Quick Start
Following blew steps, you will use this tool quickly.
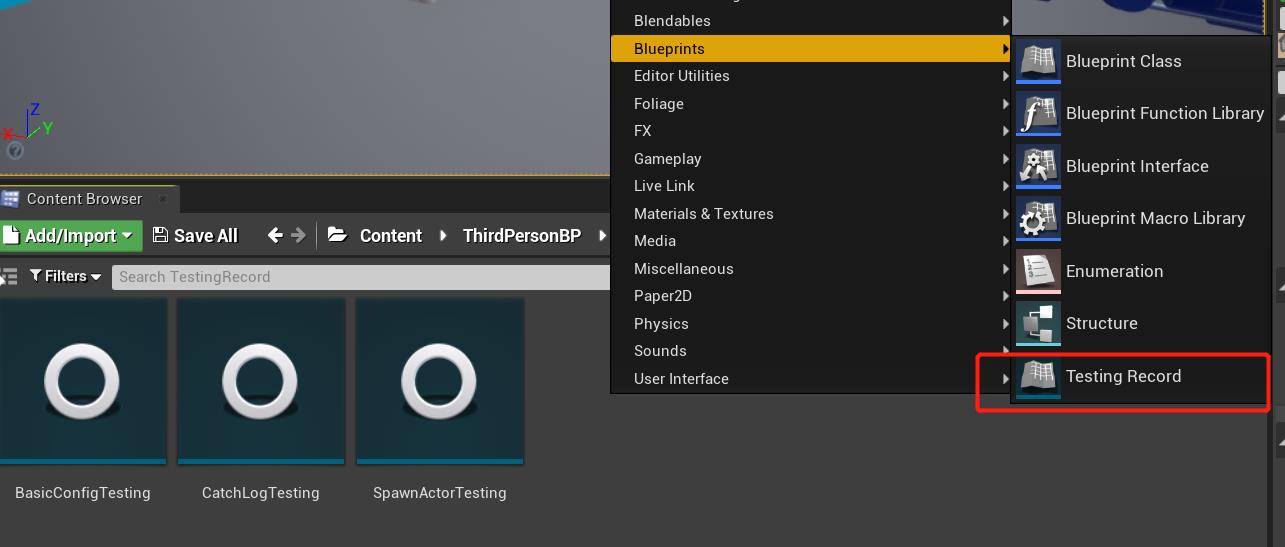
(1) Create a Testing Record Blueprint

(2) Setup Testing Configs
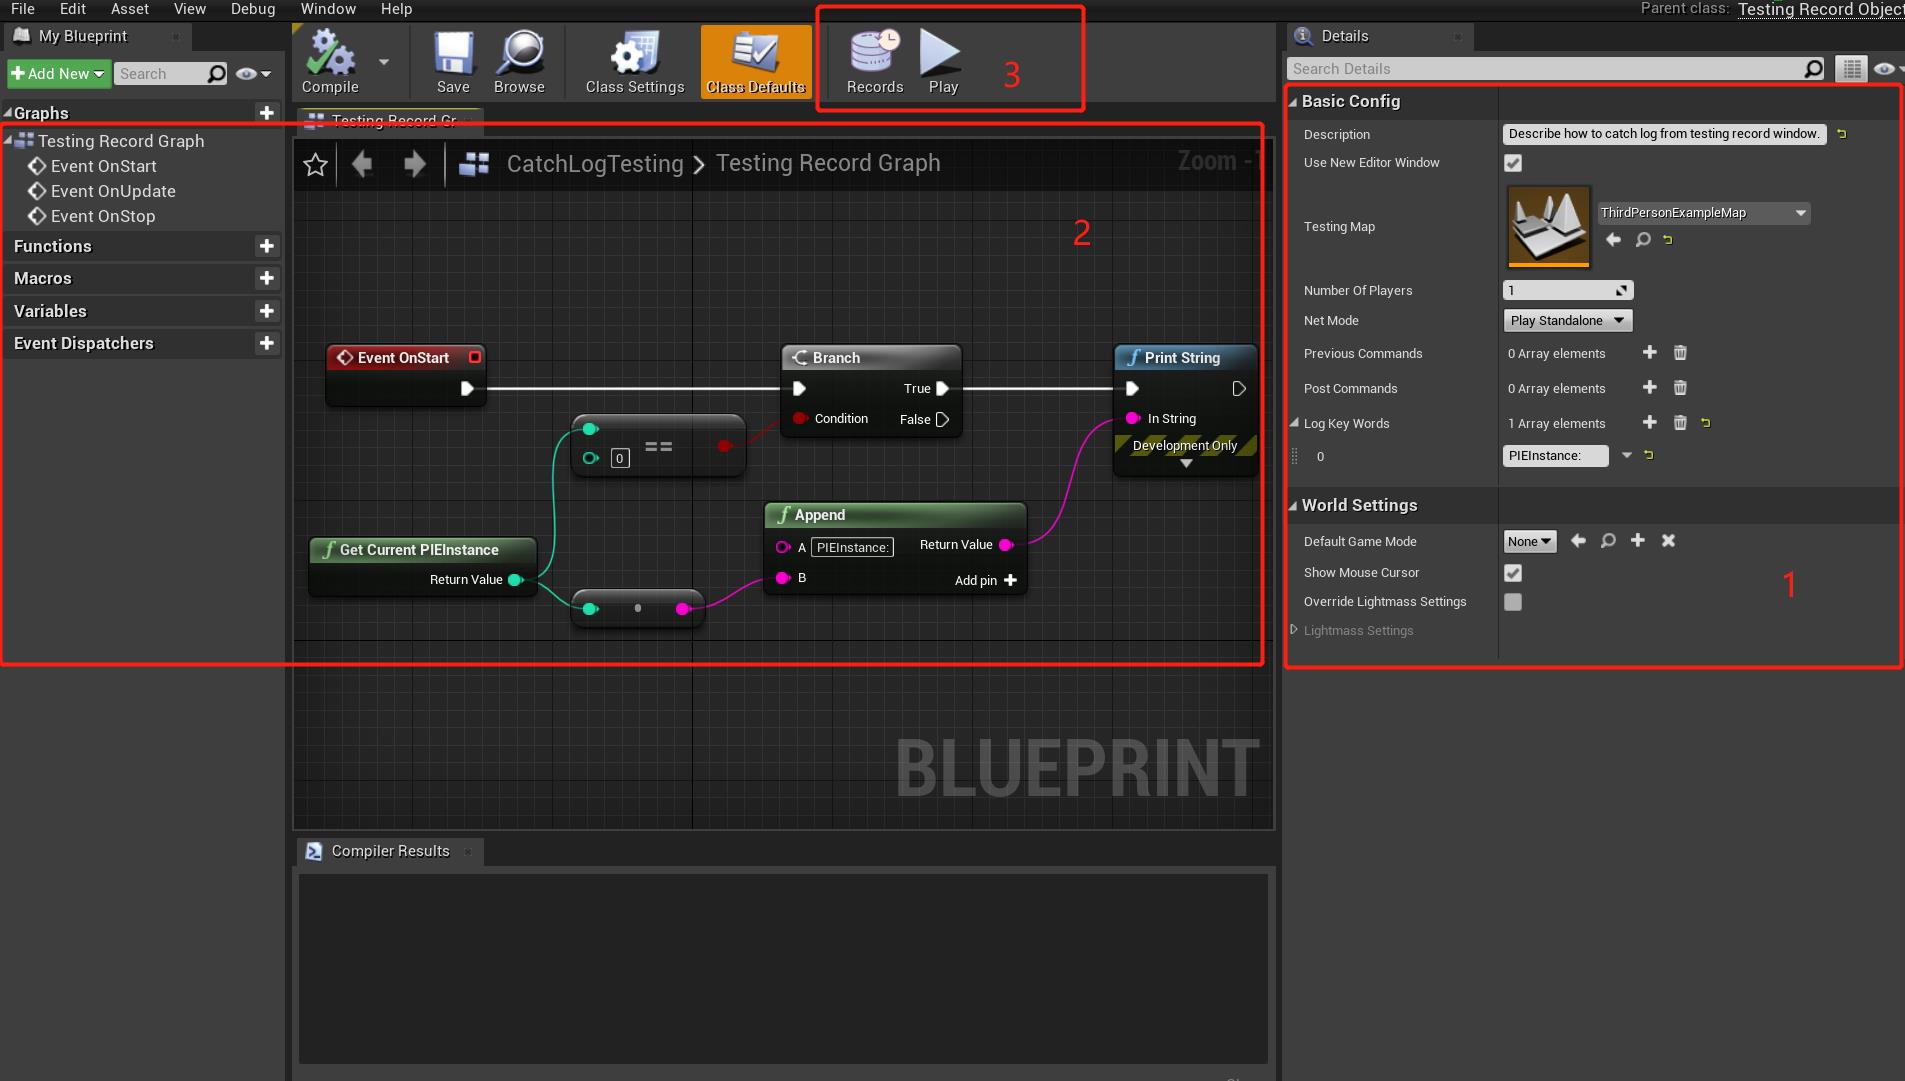
Open the blueprint created from step (1) and config your testing as follow.

In the above image, there are three major parts for testing record.
-
Part 1: The properties for testing, including testing map, number of players…(details in next section).
-
Part 2: The blueprint logic for testing.
-
Part 3: The play button (run testing) and records button (show all testing records).
(3) Run a Testing Record
Click the “Play” button inside the blueprint to run the testing record directly.
(4) Save a Testing Record
Click the “Save” button to save the blueprint and click the “Records” button to show all testing records.
4 Details of Testing Record
(1) Testing Properties
-
Description: The description of a testing record, also used in searching inside all testing records window.
-
bUseNewEditorWindow: If use a new PIE window for testing.
-
TestingMap: Testing map using in current testing record.
-
NumberOfPlayers: Number of clients for testing.
-
NetMode: Editor net mode.
-
PreviousCommands: Run editor commands before playing.
-
PostCommands: Run commands after playing.
-
LogKeyWords: Redirect the log by key words to current testing record blueprint window.
-
DefaultGameMode: Editor game mode, used to override the default game in world setting (do nothing if it is null).
-
bShowMouseCursor: Show mouse cursor in editor while playing.
-
bOverrideLightmassSettings: If override lightmass setting in editor.
-
LightmassSettings: Override lightmass setting in editor.
(2) Testing Logic
-
OnStart(): Start function while begin playing.
-
OnUpdate(float DeltaTime): Tick function for testing logic, such as delay.
-
OnStop(): Stop function while end playing
-
GetCurrentPIEInstance(): Using this function to get current PIE client index as the testing record is running at every client.
(3) Testing Records
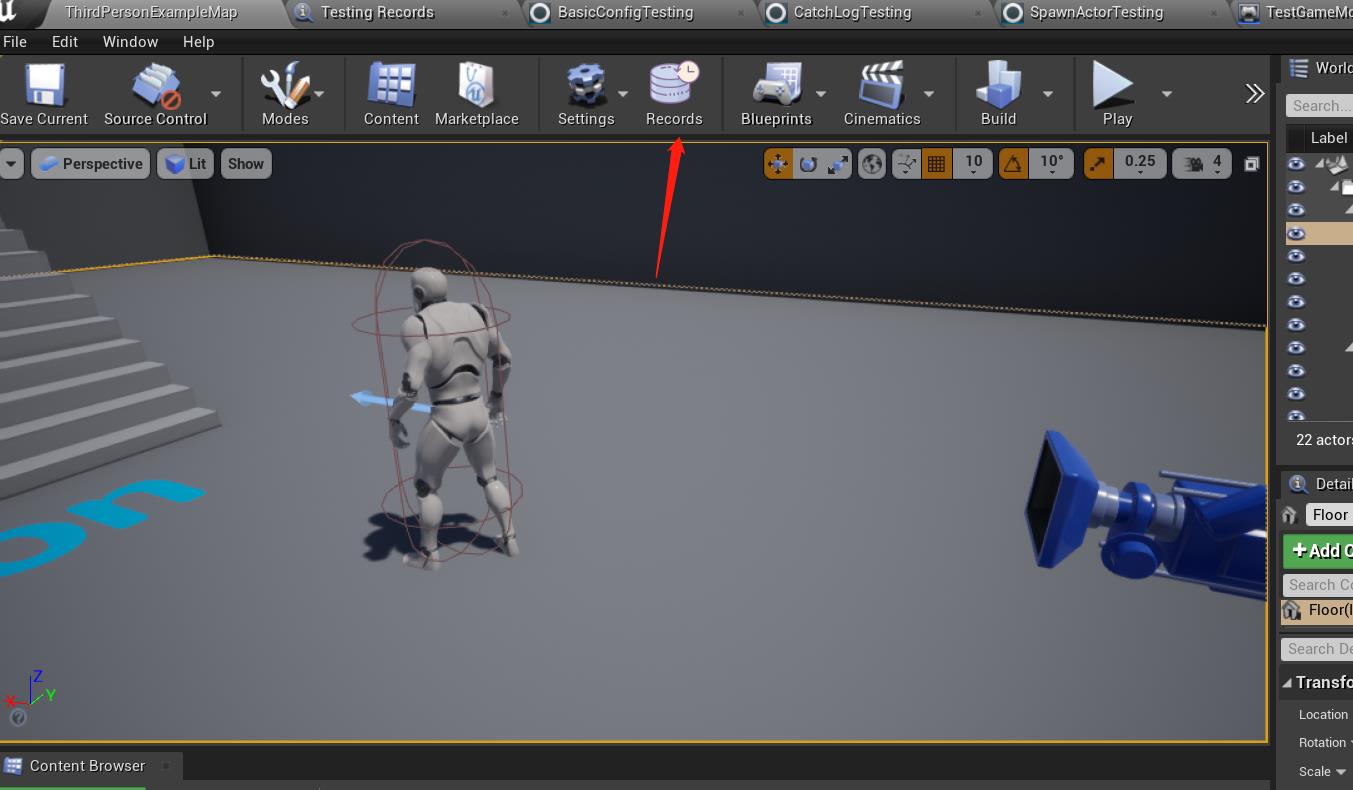
Click “Records” button in a testing record blueprint or the following button to show all testing records.


Notice that you can search your testing records easily and open it by double click.
5 Compile plugin for your own C++ project
if you want to add the plugin to your own project, just following the steps given below.
-
Put plugin to folder “Plugins” in your project.
-
Right click your project file(.uprojcet) and select “Generate Visual Studio project files”
-
Open Visual Studio project and complile.
6 Support
In the event you are unable to find the information you seek, feel free to contact easycomplex.tech@gmail.com.