1 Overview
This User Guide was designed to provide users with a basic overview of the features and functionality of this tool.
- Preview: Unity Quick Logo Designer
2 Installation
After you have downloaded this tool from Unity’s Asset Store. Take steps: “Asset -> Custom Package..”. In the Import Asset window, find and select the QuickLogoDesigner.unitypackage file. After the “Importing package” window appears in Unity, verify that all items to import are selected and then click the Import button in the bottom right of the window. This asset has two dependencies : TextMesh Pro and Vector Graphics.
3 Introduction
QuickLogoDesigner is a tool to generate picture or logo. Users can add photo, shape, text to canvas and edit them, including their color, position, rotation, size, layer. Also, users can change canvas size and save canvas as png or jpg file.
4 Quick Start
4.1 Tool Tab

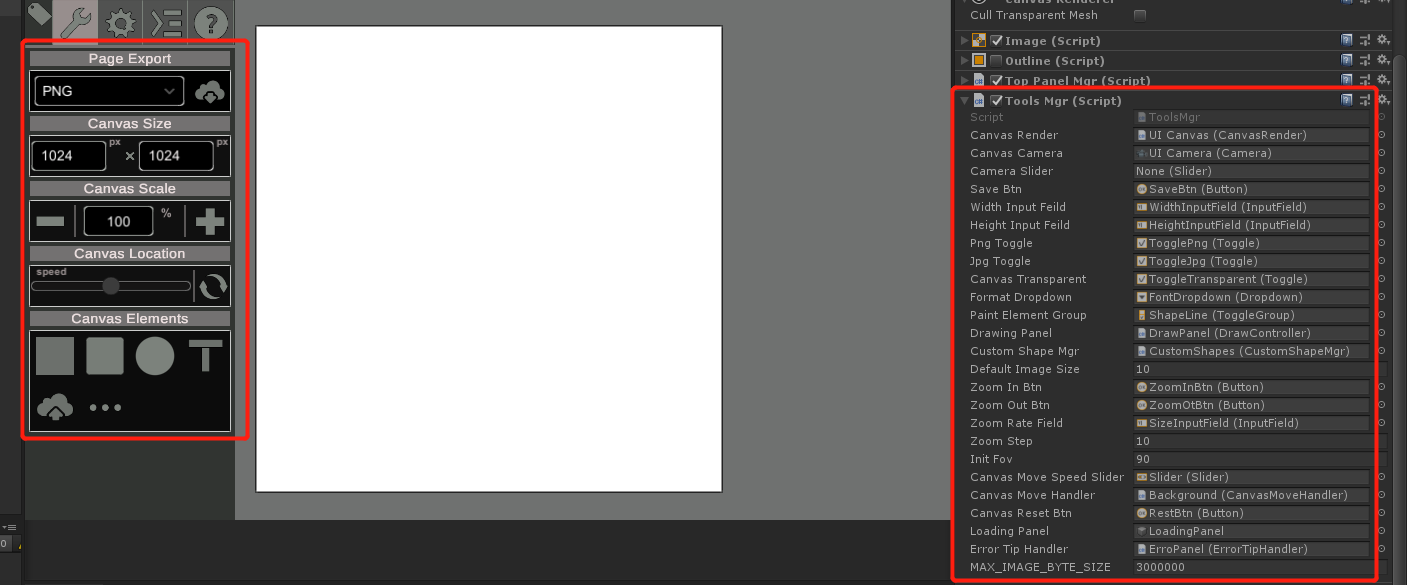
Tool tab is controlled by script ToolsMgr.cs, including following features.
-
Page Export: export canvas as png or jpg file.
-
Canvas Size: set canvas size.
-
Canvas Scale: change canvas scale.
-
Canvas Location: set the speed to move canvas (drag to move canvas).
-
Canvas Element: press to add shape, picture or text to canvas.
4.2 Setting Tab

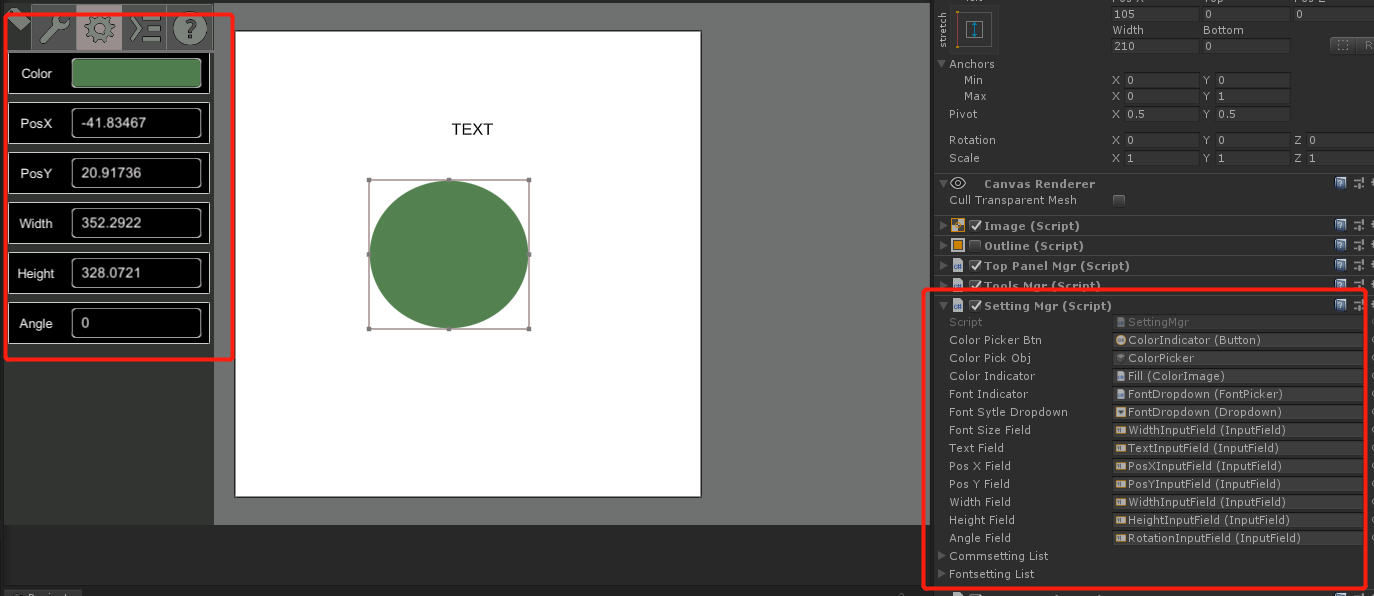
Setting tab is controlled by script SettingMgr.cs, including following features.
-
Color: change canvas element’s color.
-
PosX/Y: change canvas element’s position.
-
Width/Height: change canvas element’s size.
-
Angle: change canvas element’s rotation.
-
Text: text style can be changed as well.
4.3 Layer Tab

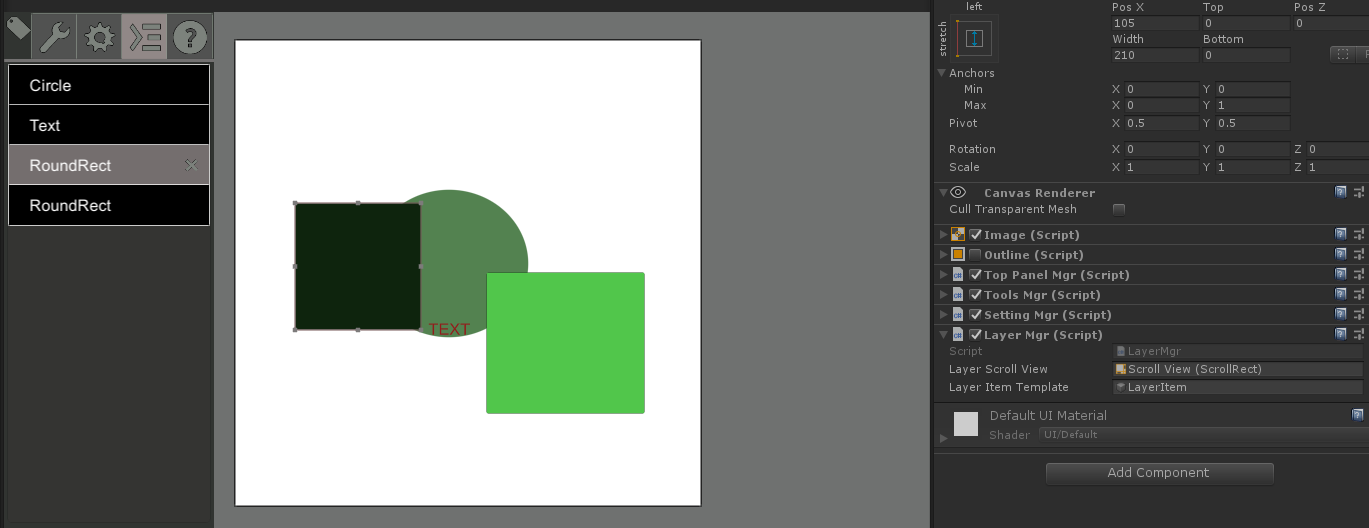
Layer tab is controlled by script LayerMgr.cs. Users can drag to change the layer of any canvas element.
4.4 Other Operations
-
Select and drag to move any canvas element .
-
Scale canvas element by dragging its four corners.
5 Code
The best way to learn is to open the “PainterScene” in Demo folder. All the scripts are located in Assets/Scripts folder.
6 Support
In the event you are unable to find the information you seek, feel free to contact easycomplex.tech@gmail.com.