Shooting Weapon
1 Shooting Weapon Design
The structure of weapon system is given below.
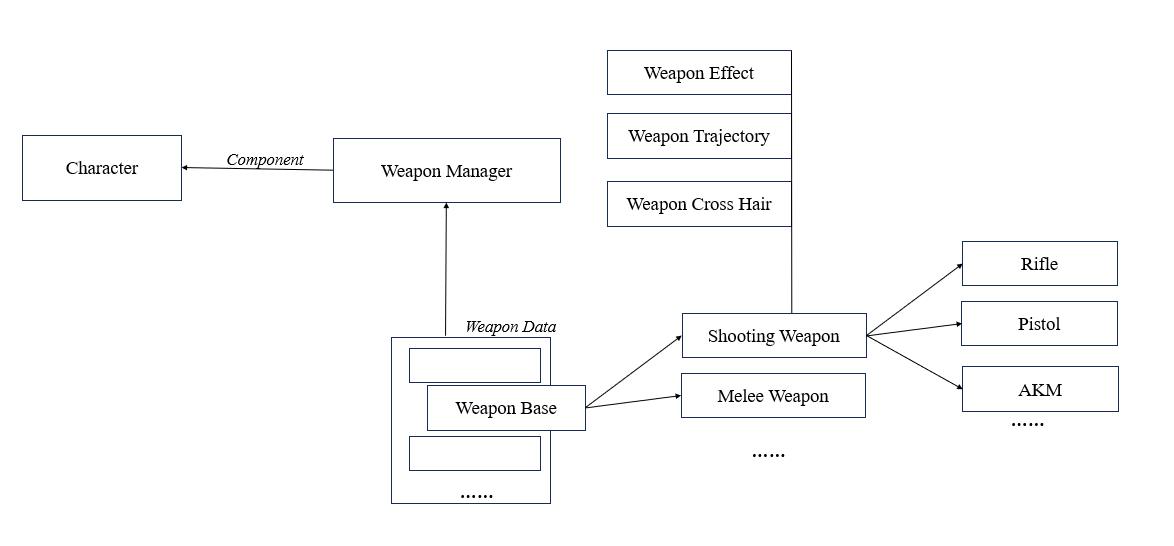
According to section 4.2 in Weapon System Design, we create the child blueprint of BP_WeaponBase_USG, named BP_ShootingWeapon_USG, for shooting weapon.
- /Game/USGT/Framework/Weapon/BP_ShootingWeapon_USG
Implement two functions from parent:
-
StartAttack
-
StopAttack
1.1 StartAttack and StopAttack Implementation
In order to make weapon system uncoupled, we need to add the create several interfaces (IF_WeaponOwner_USG), which will be implemented in the weapon owner class.
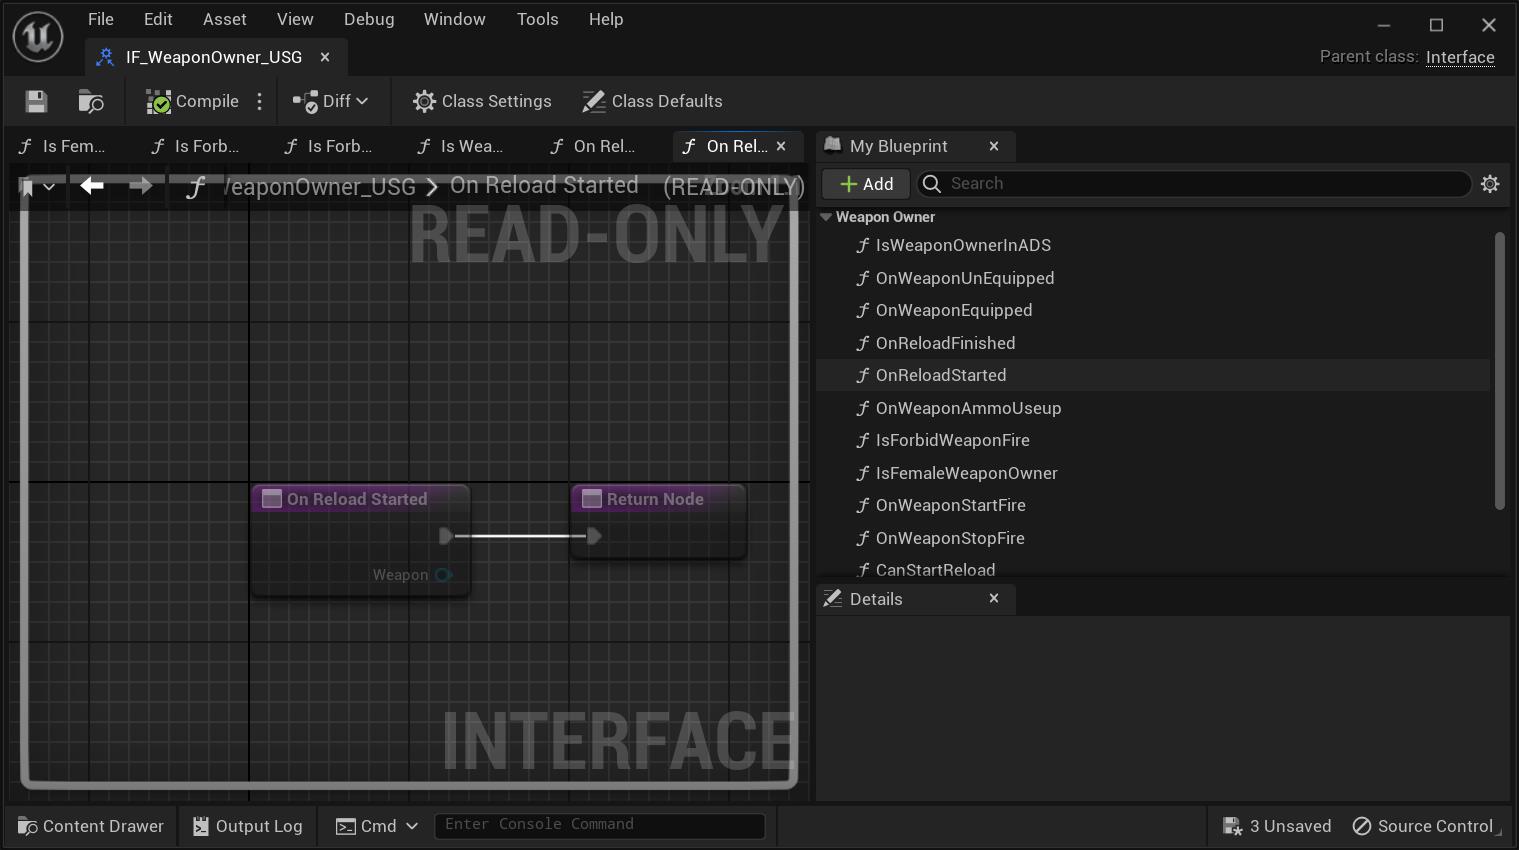
-
IsForbidWeaponFire: Whether the weapon fire is allowed.
-
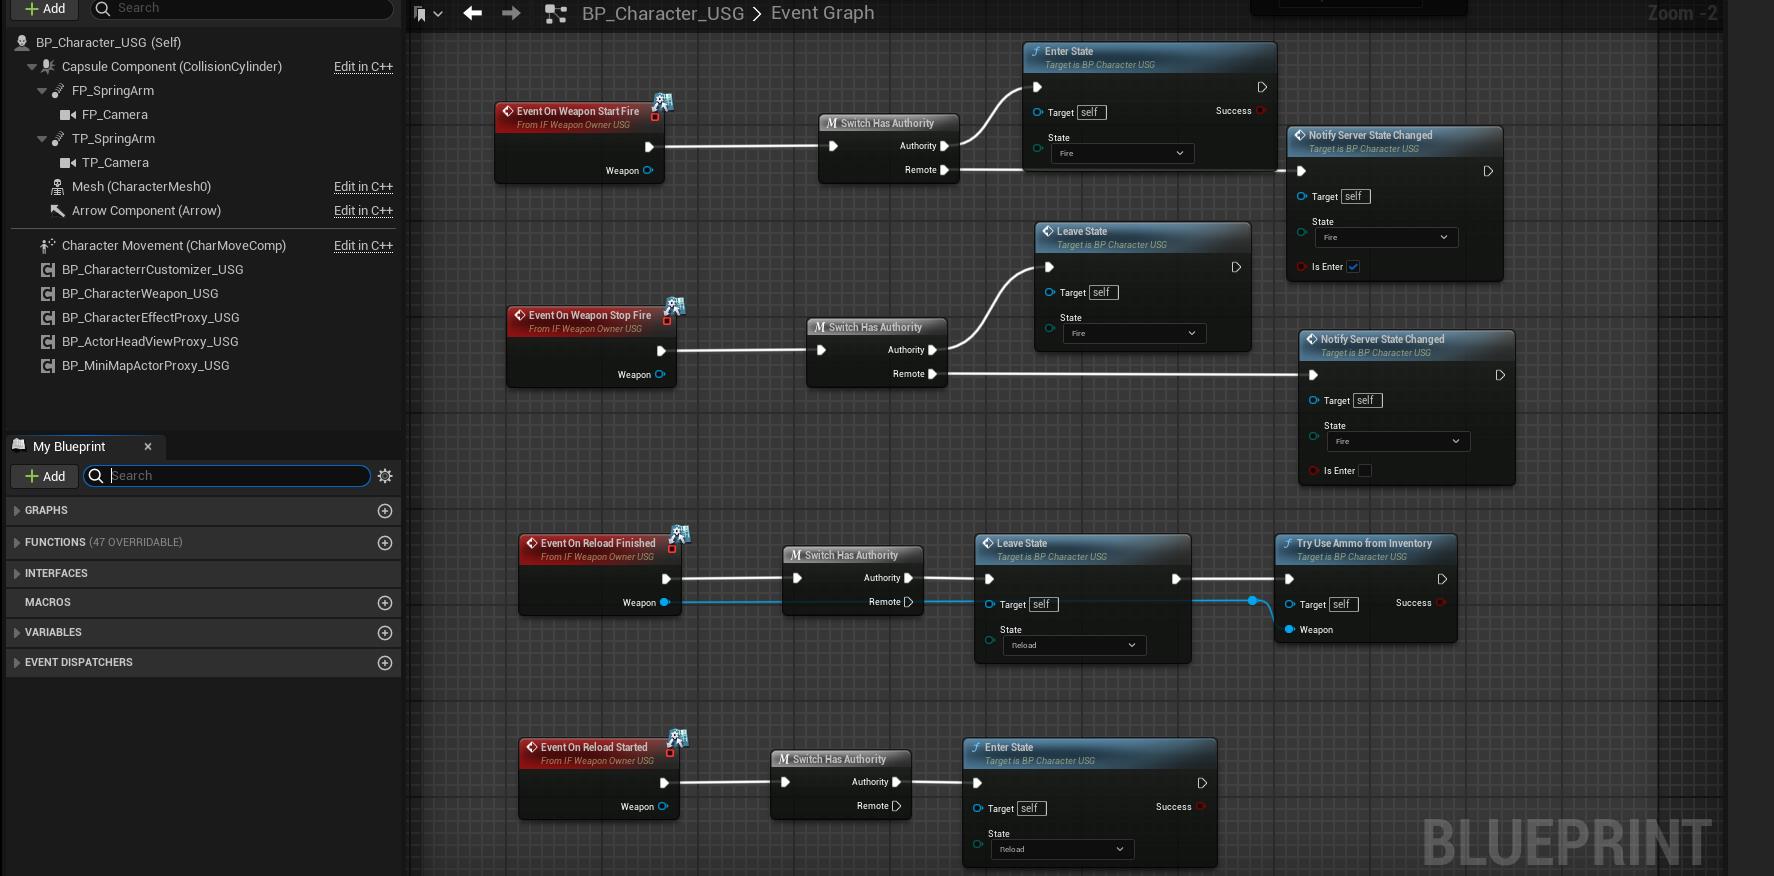
OnWeaponStartFire: When starting fire, tell owner to change to fire state.
-
OnWeaponStopFire: When stopping fire, tell owner to end fire state.
-
IsWeaponOwnerInADS: Whether the weapon ADS is allowed.
-
OnReloadStarted: When starting reload, tell owner to change to reload state.
-
OnReloadFinished: When stopping reload, tell owner to end reload state.
-
OnWeaponAmmoUseup: When ammo used up, tell owner to reload from inventory.
-
CanStartReload: Whether the weapon reload is allowed.
Implement StartAttack:
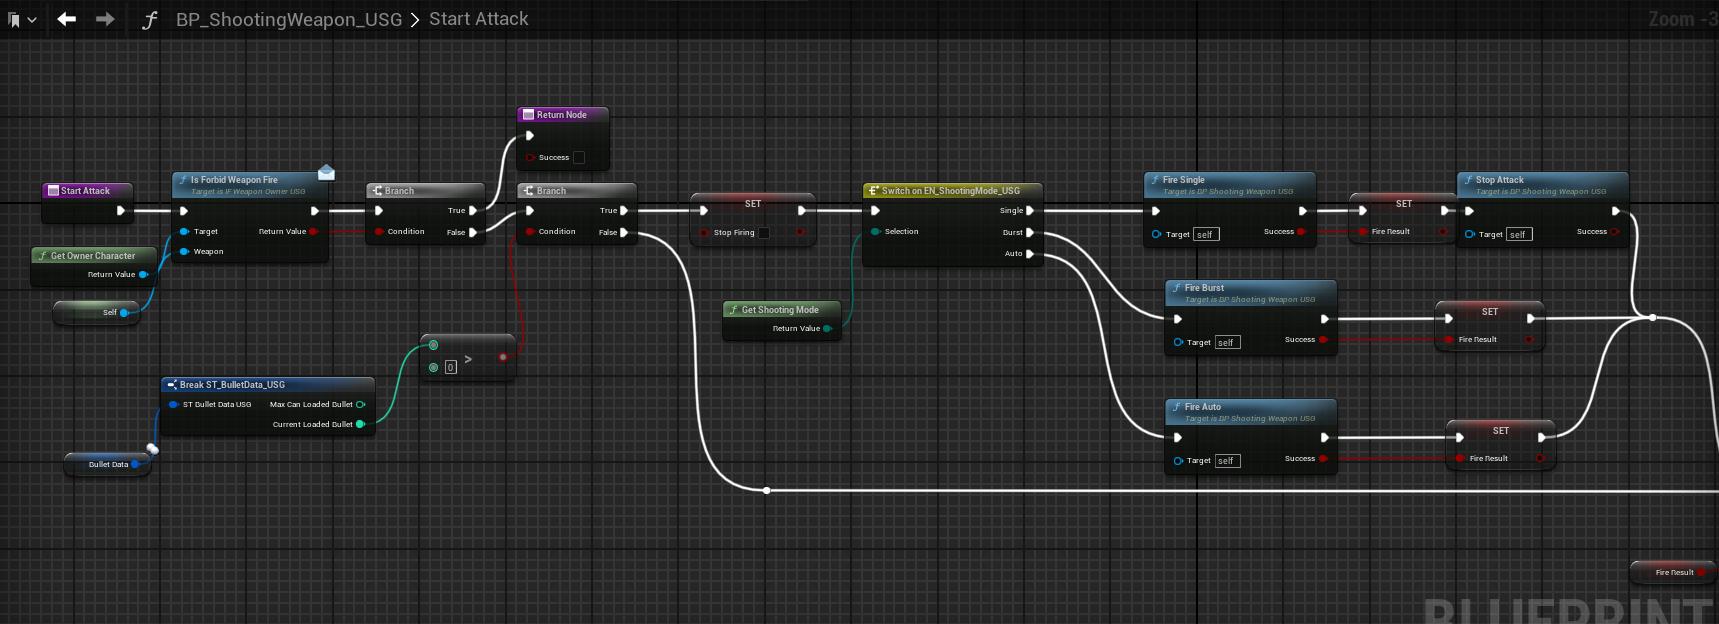
For shooting weapon, we have three shooting mode.
-
Single Mode: One shot per trigger press (fire button or left mouse click).
-
Burst Mode: Multiple shot per trigger press.
-
Auto Mode: Shooting until trigger release or ammo used up.
Notice that StartAttack is called from locally controlled player and the bullet is created from local client and notify hit from client to server for shooting weapon. The reason is that the shooing actio is very frequent and the move speed of bullet is very fast, if the process is running from server and the feedback will be not in time. Also, we should not create too many bullet instances and linetrace in the server for the performance consideration. For the bullet with low move speed, such as RPG, it can directly run from server.
For different shooting mode, the process will finally call the following function.
- Fire_Single
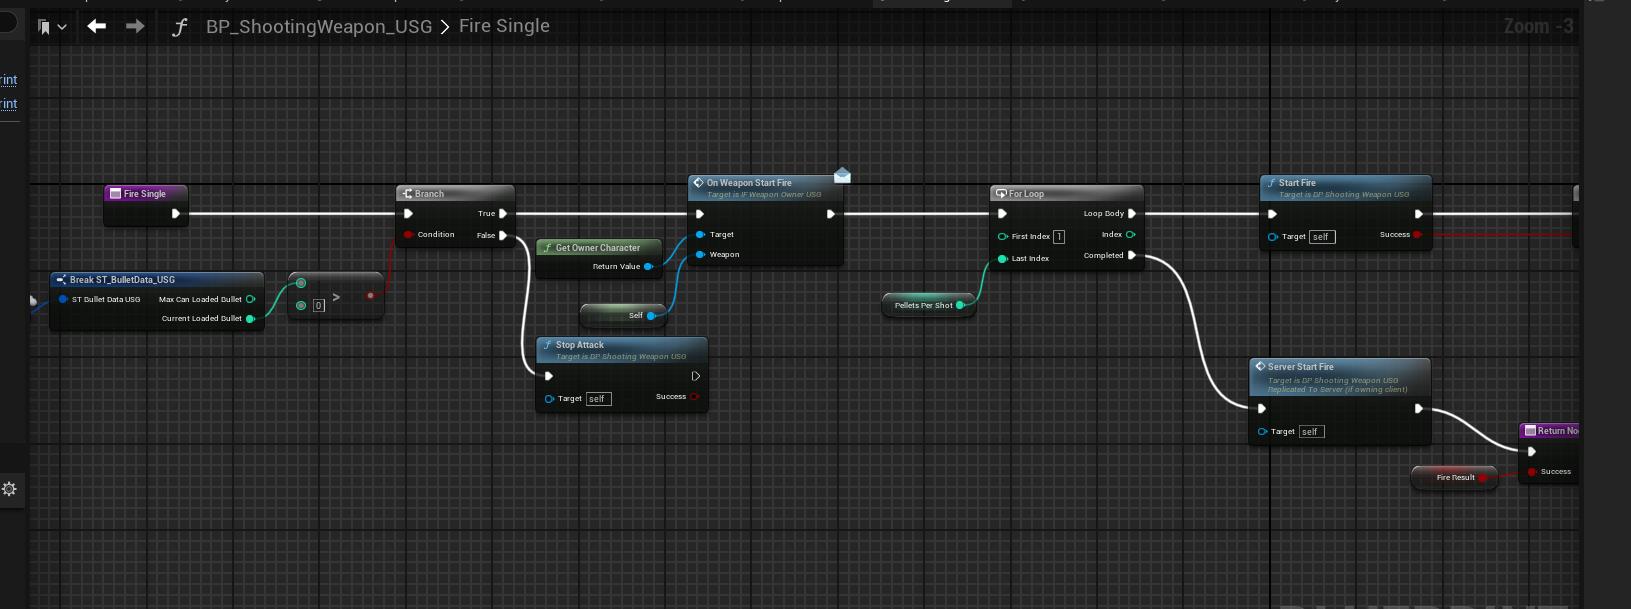
The process of one shot is given below.
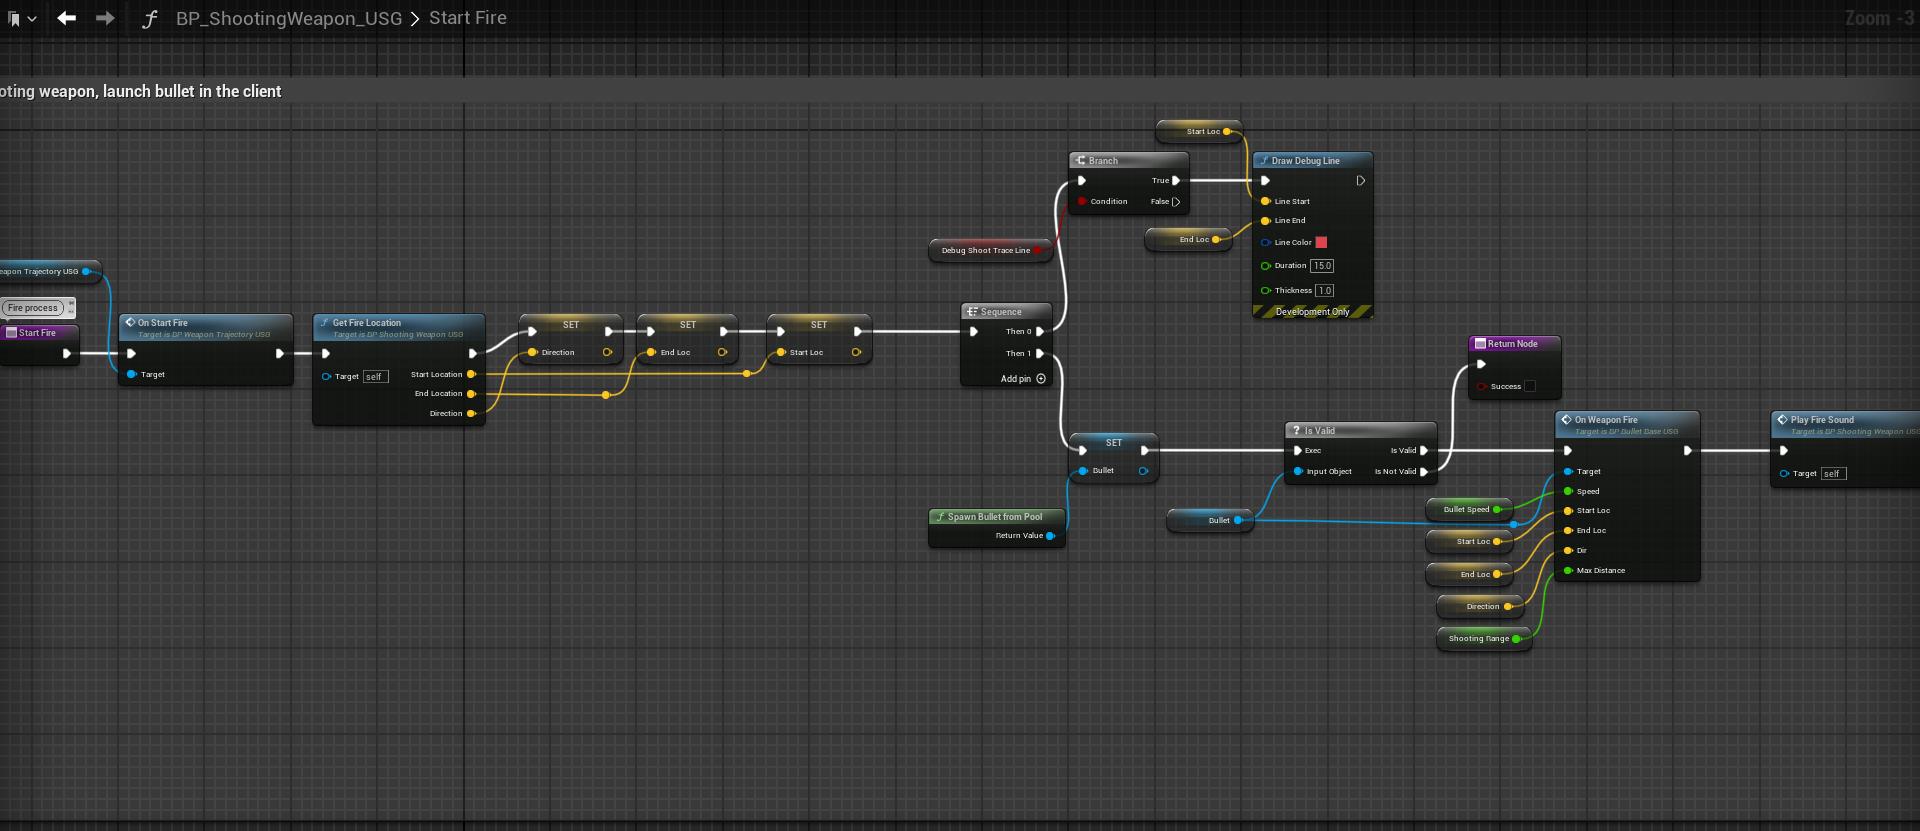
The important parts of one shot is given below.
-
Shooting direction, start and end location: We do this inside the function GetGetFireLocation. The specific logic is implemented in following blueprint.
- /Game/USGT/Framework/Weapon/Trajectory/BP_WeaponTrajectory_USG
-
Bullet movement and damage event: We will generate bullet each shot and the damage event will triggered by bullet. The bullet instance can be recycled. The specific bullet logic is implemented in following blueprint.
- /Game/USGT/Framework/Weapon/Bullet/BP_BulletBase_USG
-
Shooting effect and voice: We can directly do these effects (Autonomous or simulated client) inside the weapon actor blueprint as weapon actor is replicated.
The above parts will be described in detail in following sections.
For the reloading process, we will check ammo from server and broadcast to clients to display reload animation.
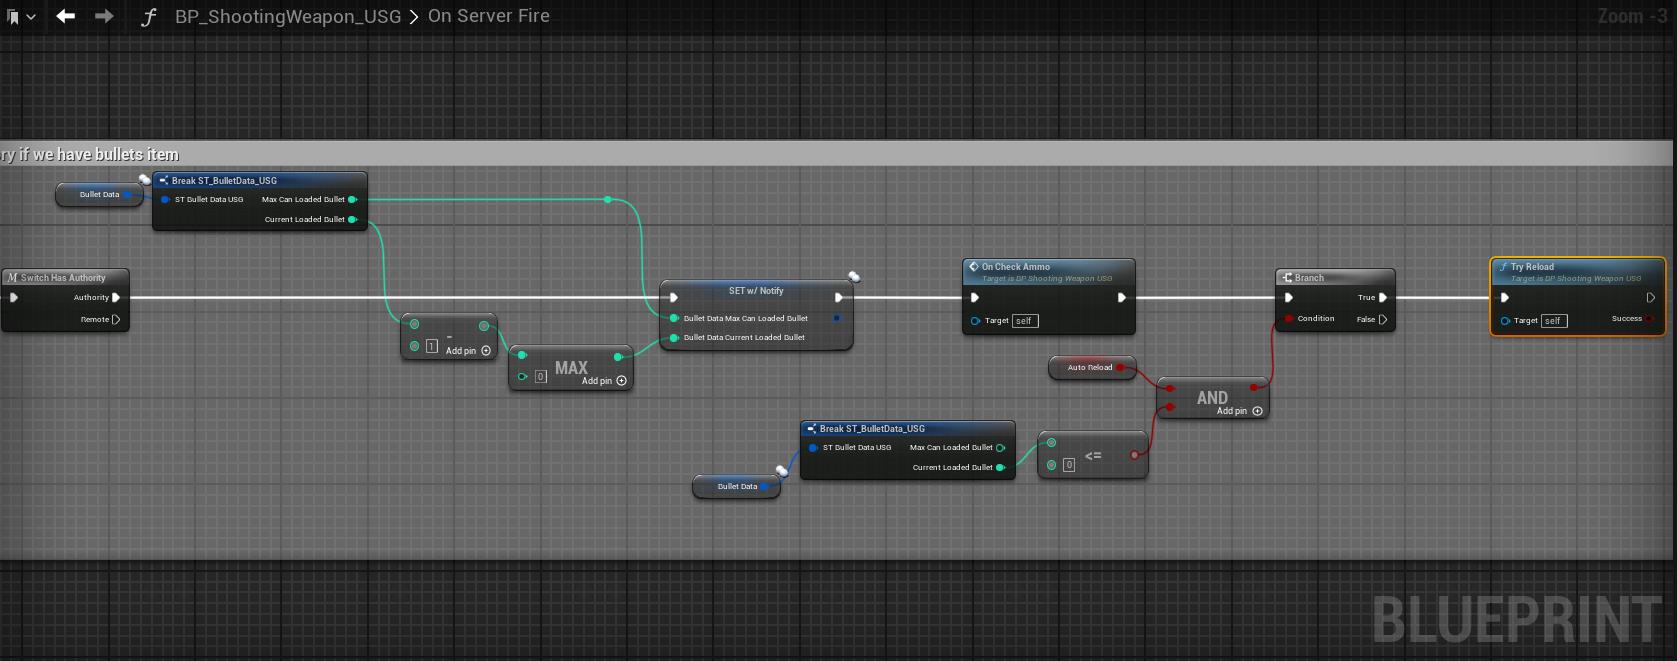
Then, implement the following interfaces in character blueprint to tell the character enter or leave fire and get ammo from inventory for reloading.
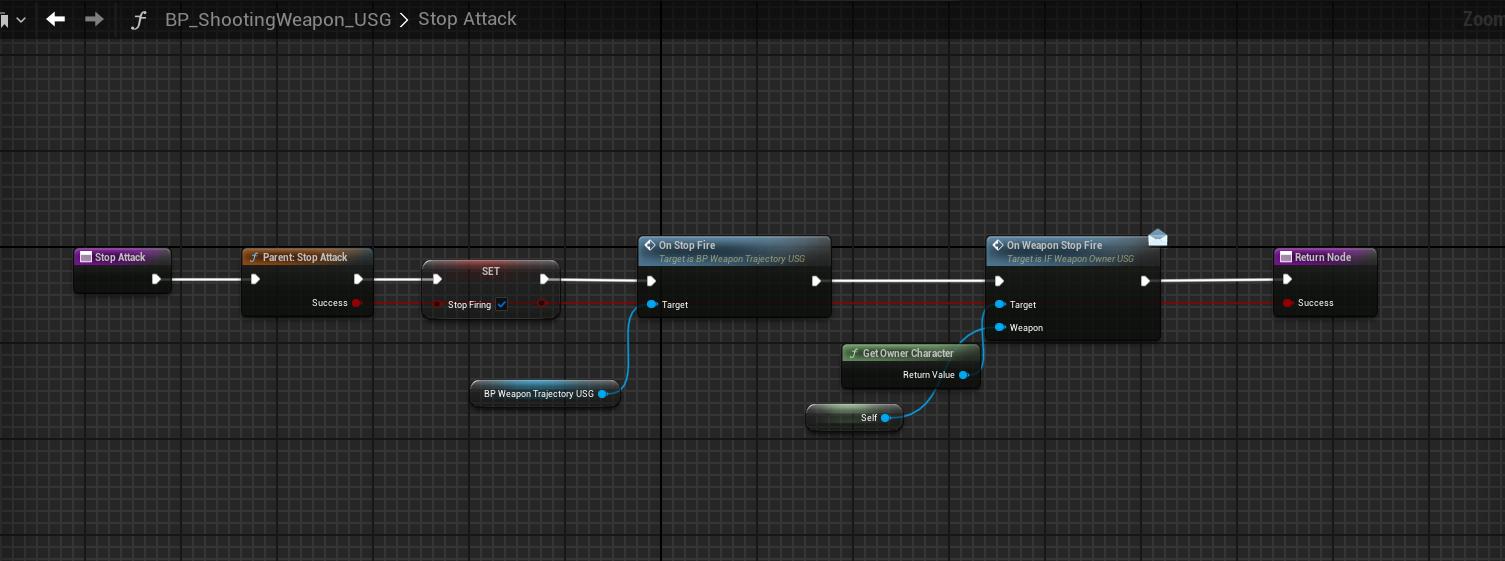
Finally, make some clear operations in the StopAttack function.
1.2 Bullet and Damage Event
We will generate bullet each shot and the damage event will triggered by bullet. The specific bullet logic is implemented in following blueprint.
- /Game/USGT/Framework/Weapon/Bullet/BP_BulletBase_USG
The bullet instance can be recycled. These bullet instance is created from the client of local player. For the bullet with low move speed and the bullets amount is small, such as RPG, you can change the shooting process to server and directly generate bullet from server.
The basic bullet blueprint is given below.
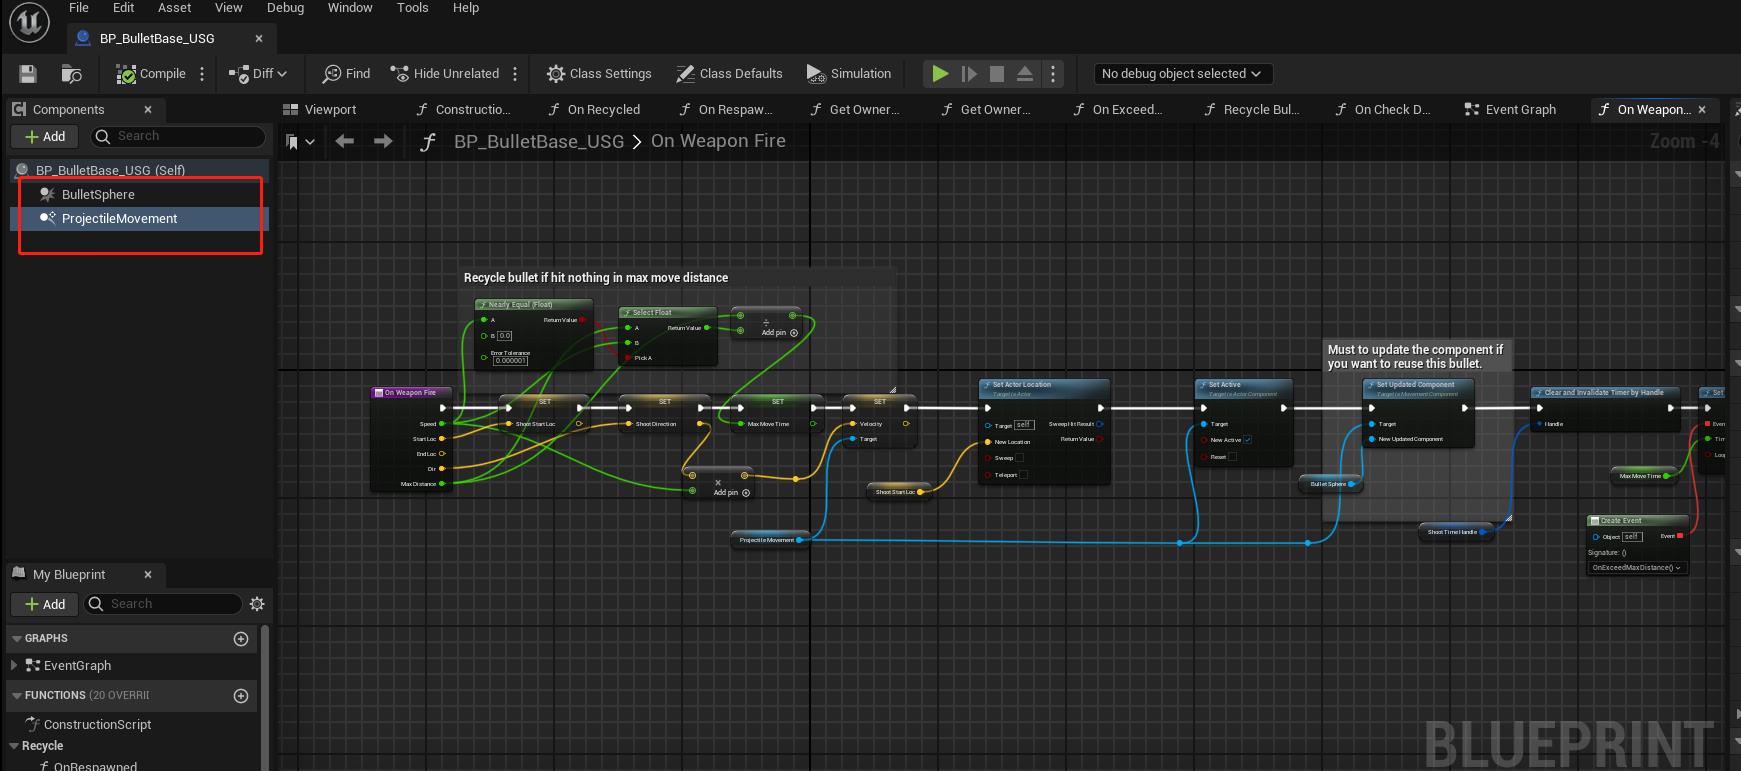
Mainly two key parts:
-
Movement: In order to simulate the movement of bullet, we add a ProjectileMovement component, which can easily simulate the movement with given start location and velocity.
-
Damage: In order to trigger damage event, we add a sphere collision and set it as the updated component of ProjectileMovement component. You can adjust the sphere size and location from the child blueprint. Then, trigger the damage event and recycle bullet when ProjectileMovement stopped.

Then, implement mplement following interface for those actors who want to receive damage event.
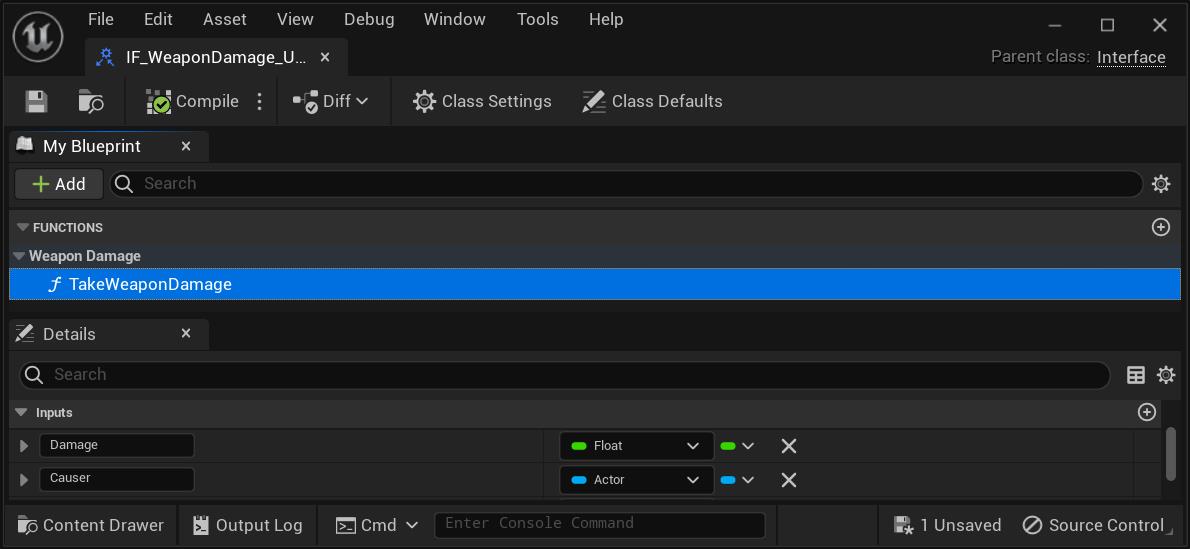
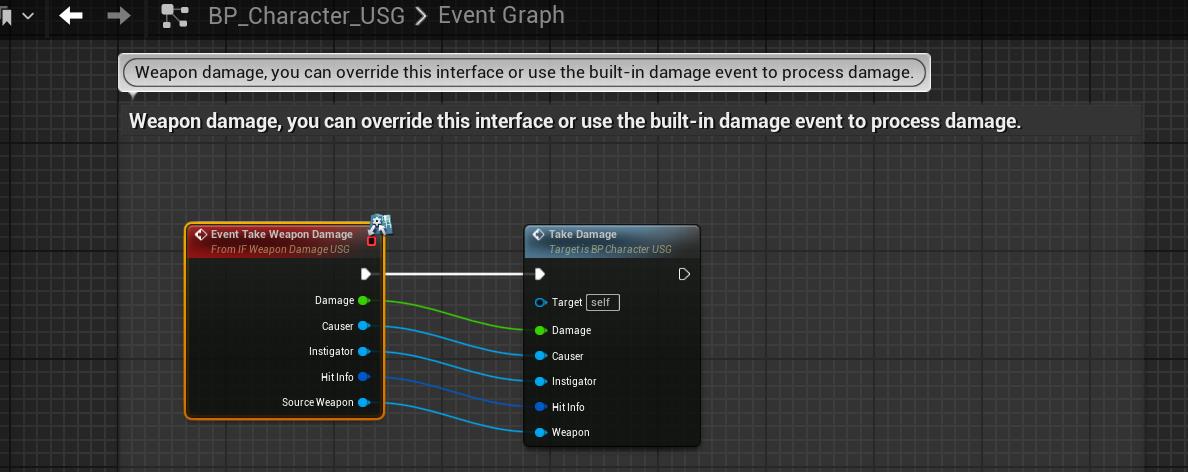
The event is triggered from server and you can broadcast damage event to clients if you need (Already done in our project).
1.3 Weapon Trajectory (Bullet Direction)
In the shooting weapon blueprint, the function GetFireLocation is used to calculate the shooting direction, start and end location.
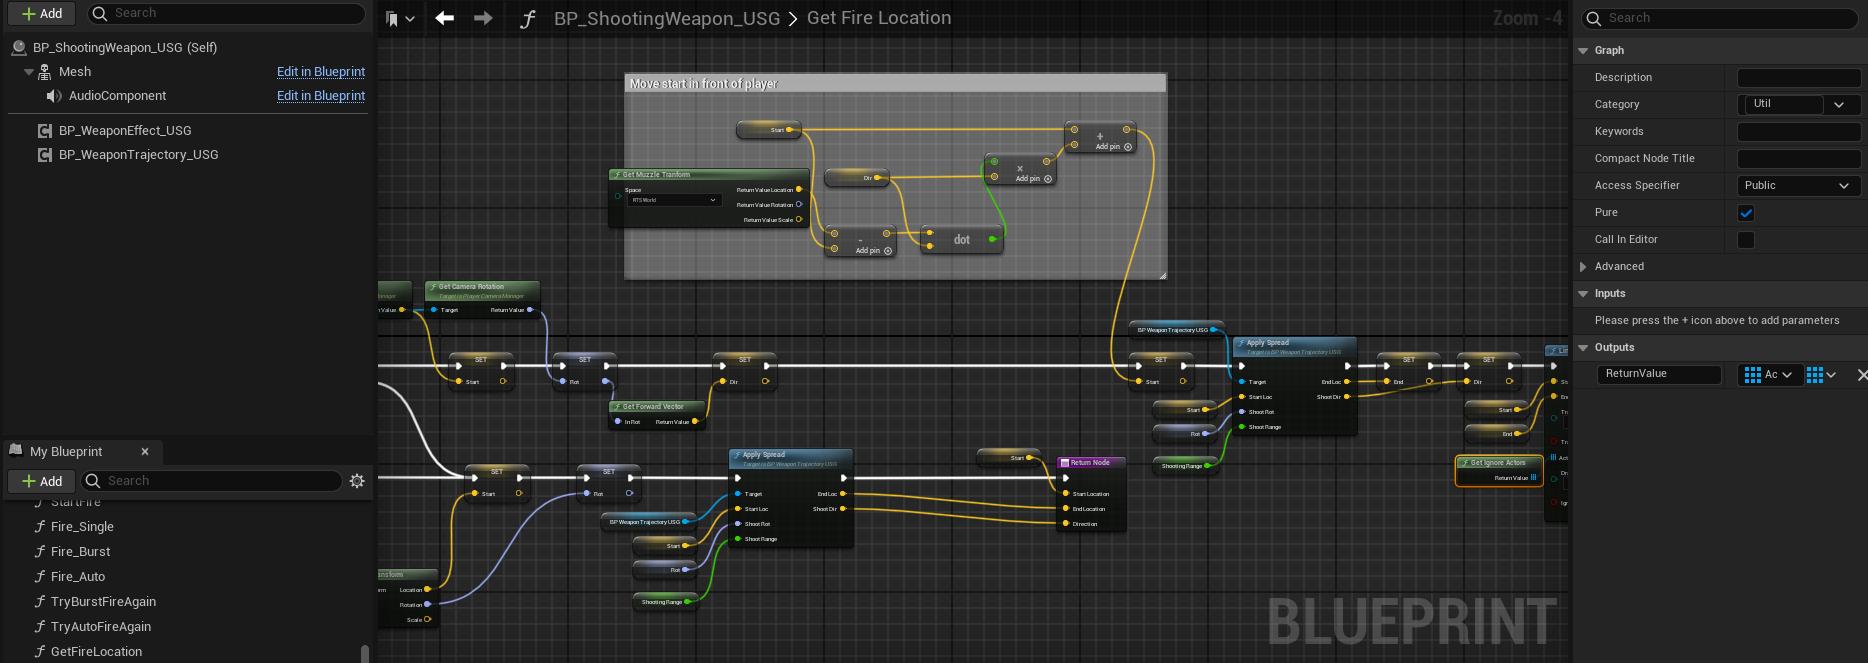
This process is complex, which was mentioned at the Weapon System Design
The logic to calcultate the bullet spread is implemented in following blueprint.
- /Game/USGT/Framework/Weapon/Trajectory/BP_WeaponTrajectory_USG
Use the following function to apply spread for bullet.
-
ApplySpread: Apply spread for input shooting direction.
-
ApplyCameraMovement: Apply camera movement for shooting.
-
TickSpreadData: Update spread data in the tick.
-
GetSpreadMultiplier: Return spread multiplier according owner character states.
-
ModifyYawPitchInput: Change yaw and pitch according to current spread.
-
GetSreenSpreadRadius: Return screen spread radius for cross hair.
The properties are given below.
-
CameraShake: Camera shake for shooting.
-
RecoilIncrement: Recoil increment for each shot.
-
RecoilDecreaseSpeed: Recoil decrease speed for continuous shooting.
-
SpreadMultiplierMax: Max multiplication fator of spread.
-
SpreadMultiplierCrouching: Max multiplication fator of spread while crouching.
-
SpreadMultiplierADS: Max multiplication fator of spread while ADS.
-
SpreadMultiplierScope: Max multiplication fator of spread while Scoping.
-
SpreadPitchMax: Max pitch spread of one shooting.
-
RecoilToSpreadCurve: Curve corresponding the relationship between recoil and spread.
-
RecoilToPitchCurve: Curve corresponding the relationship between recoil and pitch.
-
SpeedToMultipilerCurve: Curve corresponding the relationship between speed and multiplier.
2 Shooting Weapon Example
See section 3 in The Usage of Weapon System.