Mini Map
1 Overview
This document will explain how to setup the minimap based our framework.
The minimap navigation system is similar to our another plugin:
We make it as a blueprint-only module inside our framework and make it more easier to use. It is very convenient to add the mark for an actor to the minimap by adding a component.
Notice our minimap module is based the ui framework so that you need to setup HUD class as chapter HUD.
2 Setup
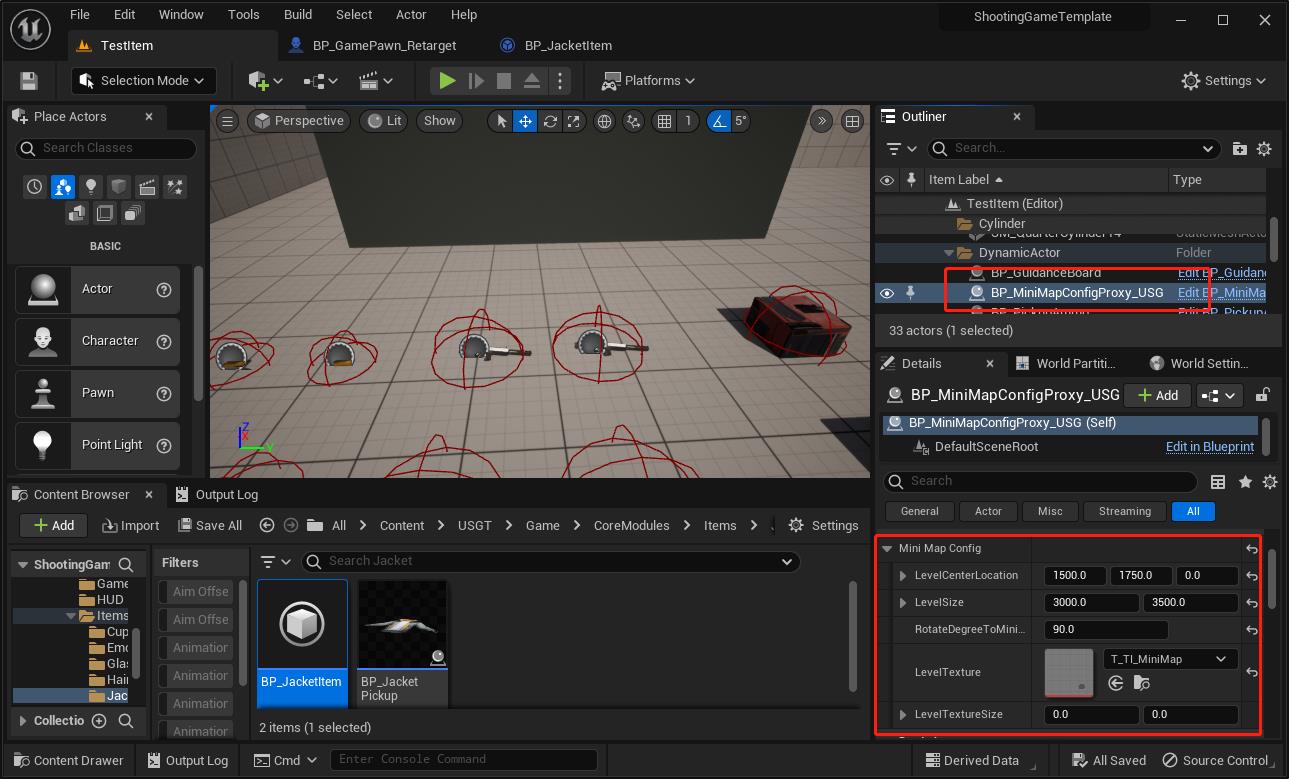
2.1 Add Config Proxy to Level
Add the following blueprint to level.
- /Game/USGT/Framework/UI/MiniMap/BP_MiniMapConfigProxy_USG
Fill the following parameters.
-
LevelCenterLocation: The absolute location of level center.
-
LevelSize: The horizontal size of the level.
-
RotateDegreeToMiniMap: The relative angle between the level and minimap texture.
-
LevelTexture: The topview texture of the level.
-
LevelTextureSize: The size with the uniform scale to the original texture size. Use the texture original size if you don’t change this parameter.
2.2 Create Minimap Item Widget
Create a widget blueprint and set its parent class as WB_MiniMapItem_USG.
See the following example in the project:
- /Game/USGT/Game/CoreModules/UI/MiniMap/Items/WB_PlayerItem
Implement the interface according to your requirement.
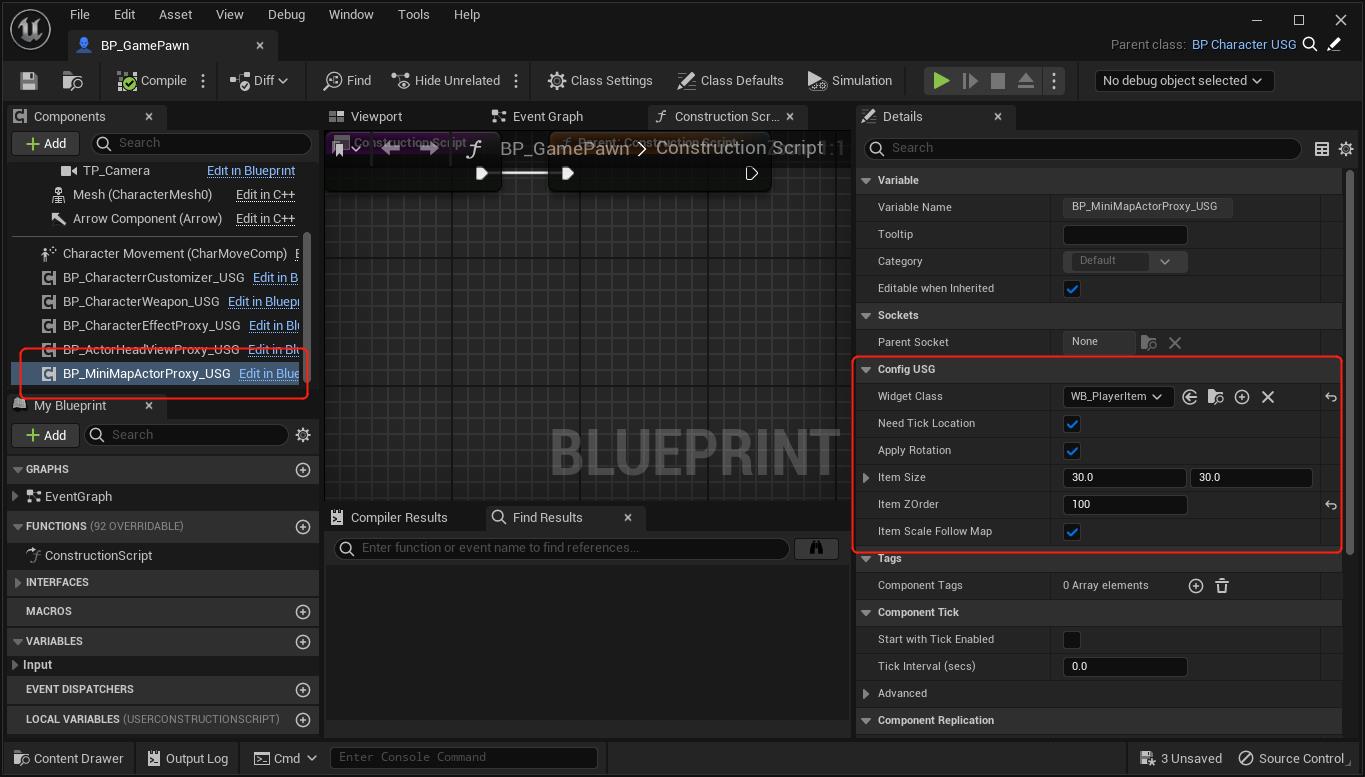
2.3 Add Proxy Component
Add a following component to your actor to display the mark in the minimap.
-
WidgetClass: The widget(section 2.2) to represent the actor in the minimap.
-
NeedTickLocation: If true, the mark widget will be moved with the actor.
-
ApplyRotation: If true, the mark widget will be rotated with the actor.
-
ItemSize: The size of the widget.
-
ItemZOrder: The zorder of the widget. Use this to adjust the hierarchy of different minimap item widget.
-
ItemScaleFollowMap: If true, the widget will be scaled with the minimap.
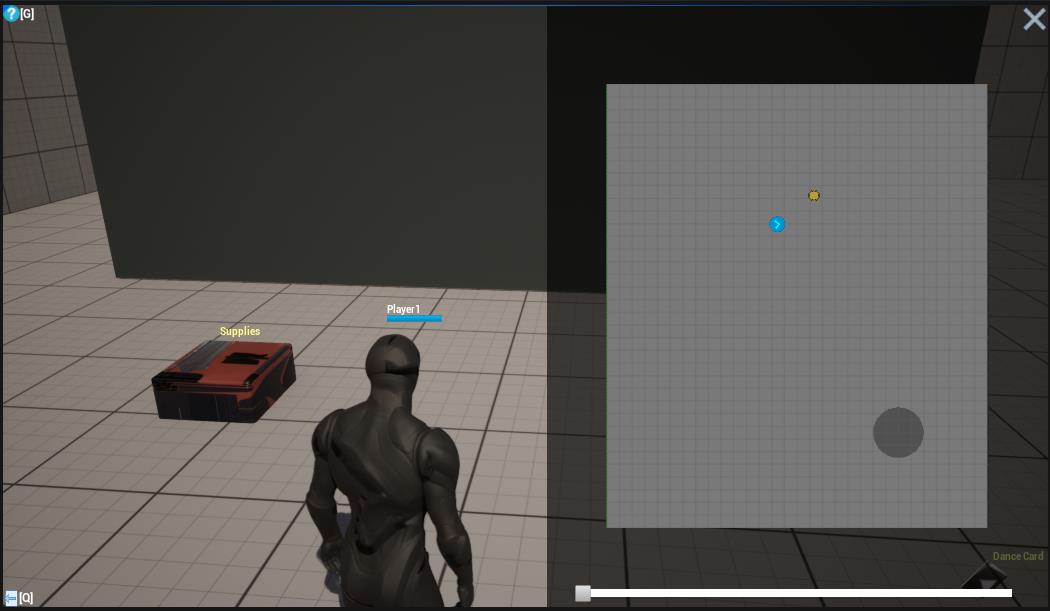
Play the level and you will see the following minimap.